Plant Product Photography: Show Shape, Leaf Condition and Pot Size
Photograph live plants so buyers can understand their current shape, leaf condition and size. Build a useful shot list, identify individual or batch photos, and check that edits still match the plant for sale.
·
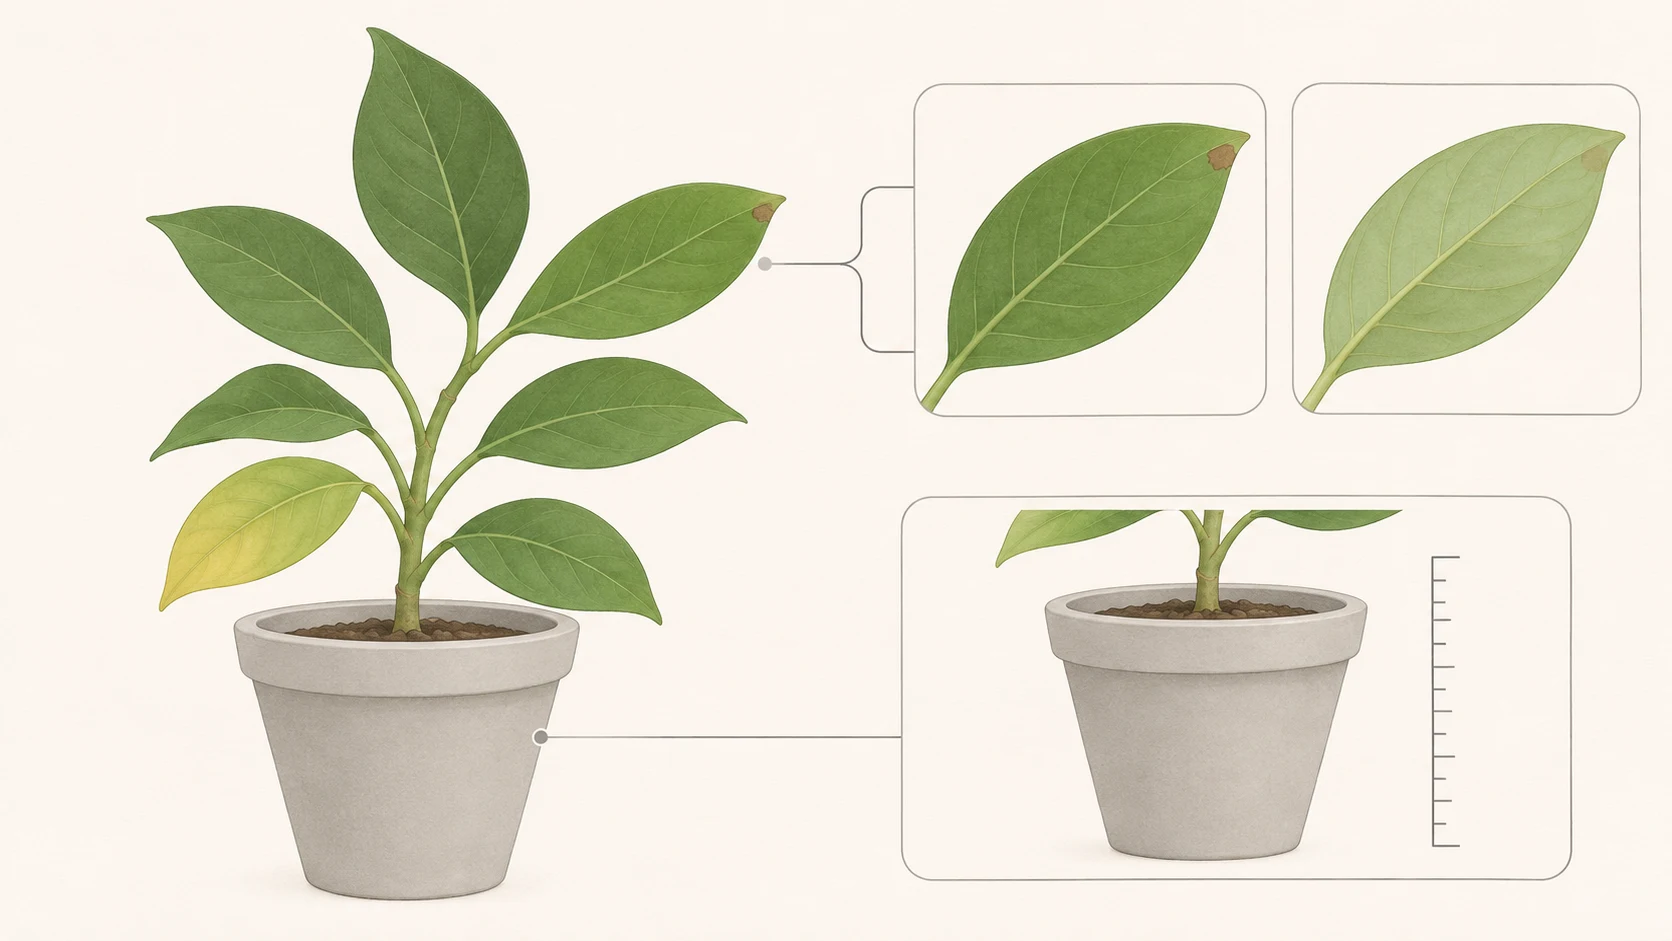
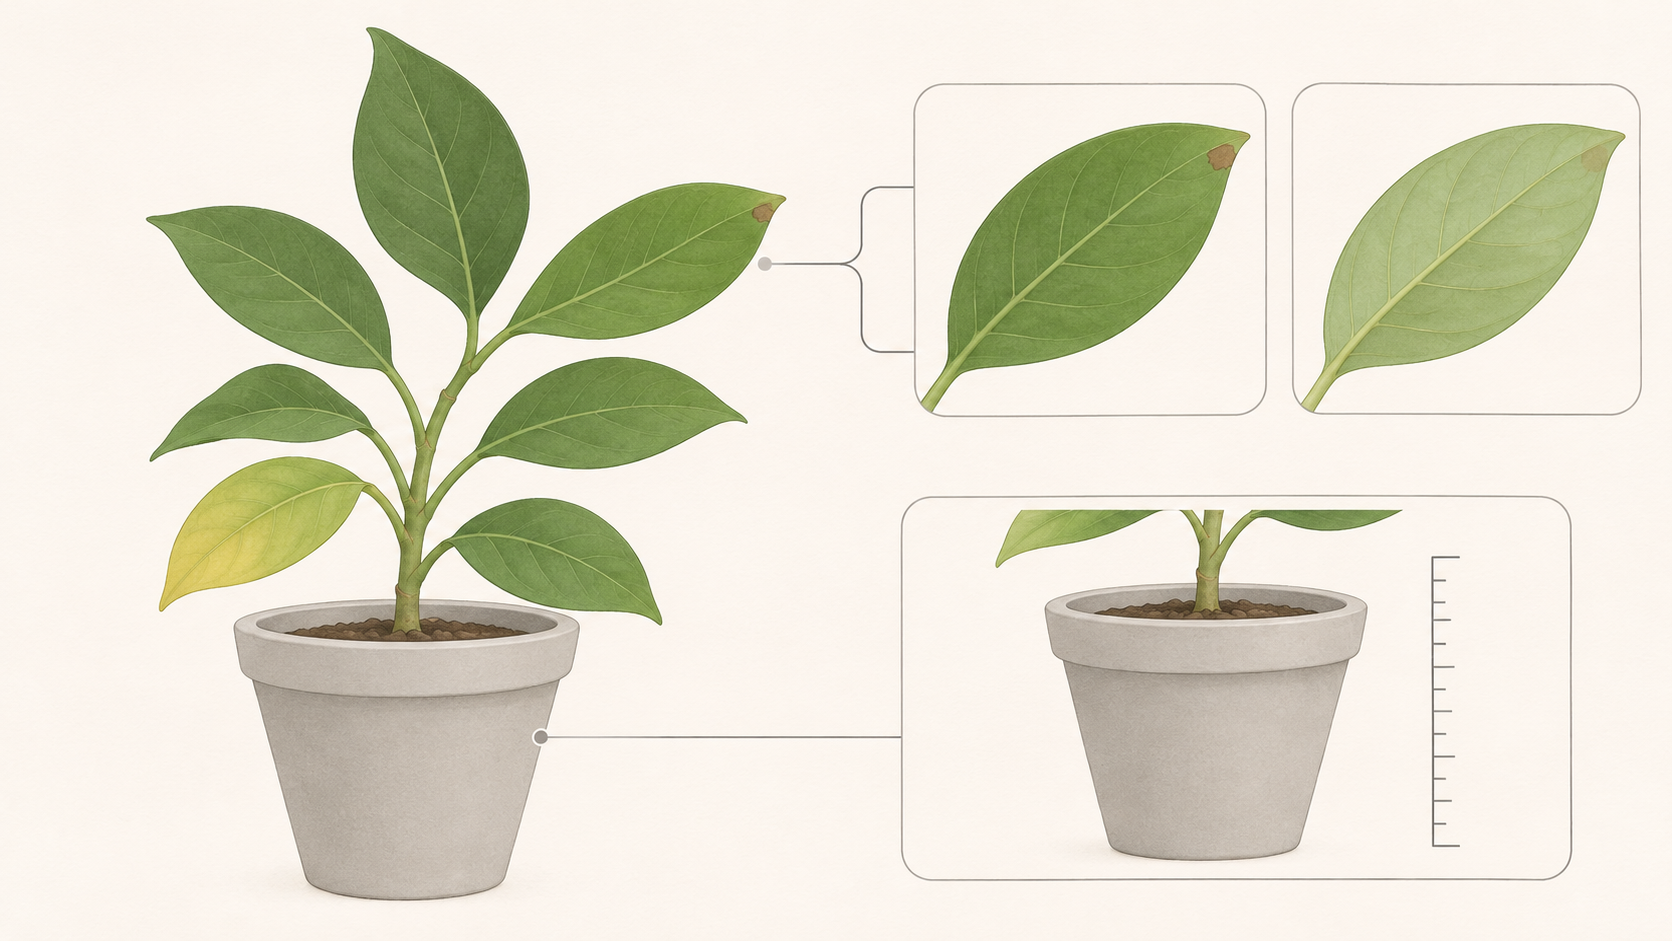
A buyer needs more than an attractive picture of green leaves. Is this the exact plant they will receive? What condition are its leaves in? Is the pot included, and how large is it? Plant product photography should answer those questions rather than make every specimen look identical.
Establish what the photograph represents
For an individually listed plant, assign an internal identifier before shooting. Keep its full-plant views, close-ups and listing connected to that identifier. Do not borrow a close-up from a fuller specimen while implying that every image shows the same plant.
For a listing supplied from a batch, label the photographs as batch examples rather than exact-plant images. State which batch they represent. If shapes vary noticeably, consider showing representative variation instead of presenting the most impressive specimen as the appearance every buyer should expect.
Keep the actual photography date with the image record. A useful caption format is:
> Photo subject: [individual plant ID or batch]; photographed: [actual date]; pot included: [actual details].
This is a suggested record format, not a report of a completed shoot. Fill it with verified listing information.
Give each image a purchasing question to answer
Start with the whole plant, then add details the main photograph cannot explain. Use the following as a shot plan, not a fixed image quota.
| Buyer’s question | Suggested photograph | Information to preserve |
|---|---|---|
| What is the overall shape? | A complete view from the pot base to the highest leaf tip; a side view when useful | Natural lean, branching and leaf density, without stretching or reshaping |
| What condition are the leaves in? | Front and underside of representative leaves, plus existing areas of concern | Yellowing, spots, tears and curled edges; enough context to locate the detail on the plant |
| What pot will arrive? | The complete pot, with the nursery pot and decorative outer pot distinguished where relevant | Which container is included, its opening dimensions and its height |
| How large is it? | The plant alongside a ruler or tape measure | Measurement endpoints and whether the stated height includes the pot |
Keep the ruler approximately in the same distance plane as the feature being measured, rather than placing it closer to the camera. Also provide the measured dimensions in text. Explain whether plant height starts at the soil surface or pot base, and whether pot diameter means the inside or outside of the rim.
Support a leaf gently when photographing its underside; do not force it into position. Record visible spots without treating a photograph alone as a diagnosis of a particular disease.
Make light and background reveal detail
Ship My Plants’ photography guide recommends bright, indirect natural light, uncluttered backgrounds and camera stability. Those are useful starting points.
Try a position near a window but out of direct sun. Look for glare across the leaf surface and lost detail along pale edges. Adjust the plant, camera or diffusion material if necessary. Where possible, avoid mixing window light with strongly colored indoor lighting that makes leaf color difficult to judge.
The background does not have to be white. Dark foliage disappearing into black, or a pale pot merging into white, makes the product harder to read. Choose a simple surface that separates the leaf edges and pot rim from their surroundings.
For the whole-plant view, position the camera roughly opposite the plant’s middle and leave room around the leaf tips and pot base. Move closer for detail views and focus on the feature being documented. Background blur is not useful if it also hides the leaf condition you need to show.
Edit the setting, not the plant’s condition
The reference guide also suggests removing dead or yellowing leaves. For an accurate sales record, do not use that advice to conceal the condition of the plant being offered. Yellow leaves, spots and individual shape can affect a buyer’s decision. If the actual plant is pruned or repotted, photograph it again so the listing shows its current state.
Cropping unrelated surroundings or making a restrained overall exposure adjustment can help organize an image. Turning a yellow leaf green, removing spots, duplicating foliage or replacing the pot with one that is not included changes product information.
If an existing photograph needs background or composition work, you can submit the image and an editing description through the InkRoom image editor. Available models and parameters depend on the current interface; subject fidelity and text accuracy are not guaranteed. Compare the result with both the original file and the plant for sale. Check shape, leaf marks, pot identity and scale information. Do not use a result that changes those details.
Keep the listing connected to the living plant
There is no need to invent one reshooting interval for every plant. Review the photographs when something relevant changes: noticeable new growth, changed leaf condition, pruning, repotting or a replacement sales batch.
Once an individually photographed plant sells, do not leave its images implying that the next buyer will receive that same specimen. Keep original files, dates and plant identifiers together, and update the listing’s individual or batch description when needed. A good-looking photograph still has a basic job: helping the buyer understand what is actually for sale.
Related articles and cases
- Stationery Product Photography: Paper, Print, and What’s Included
Plan useful photos of greeting cards, notebooks, and stationery sets. Show covers, interiors, and edges without treating a photograph as proof of page count, exact dimensions, or included accessories.
- Wine bottle photography: readable labels, clear shoulders, honest fill levels
Make wine product photographs that identify what is actually for sale. Separate catalog images from lifestyle scenes, work around label reflections, and check product details after editing.
- Product Photography Props: Make the Product Clear, Not the Offer Confusing
Choose props for support, use context, or decoration. Compare a clean product shot with a lightly styled version, then check visibility, reflections, color competition, and what buyers might think is included.
- Product Photography Color Accuracy: Gray Cards, White Balance, and Delivery Review
Not every product color error is a white balance problem. Build references for each color variant, check mixed lighting and exposure first, and review background edits separately from the product’s own color.