Hand Model Product Photography: Natural Grips, Credible Contact
Plan small-product shots around visible details, believable support and useful scale cues. Learn what to check in a real photograph or an AI composition sketch without treating either a hand or a generated image as measurement evidence.
·
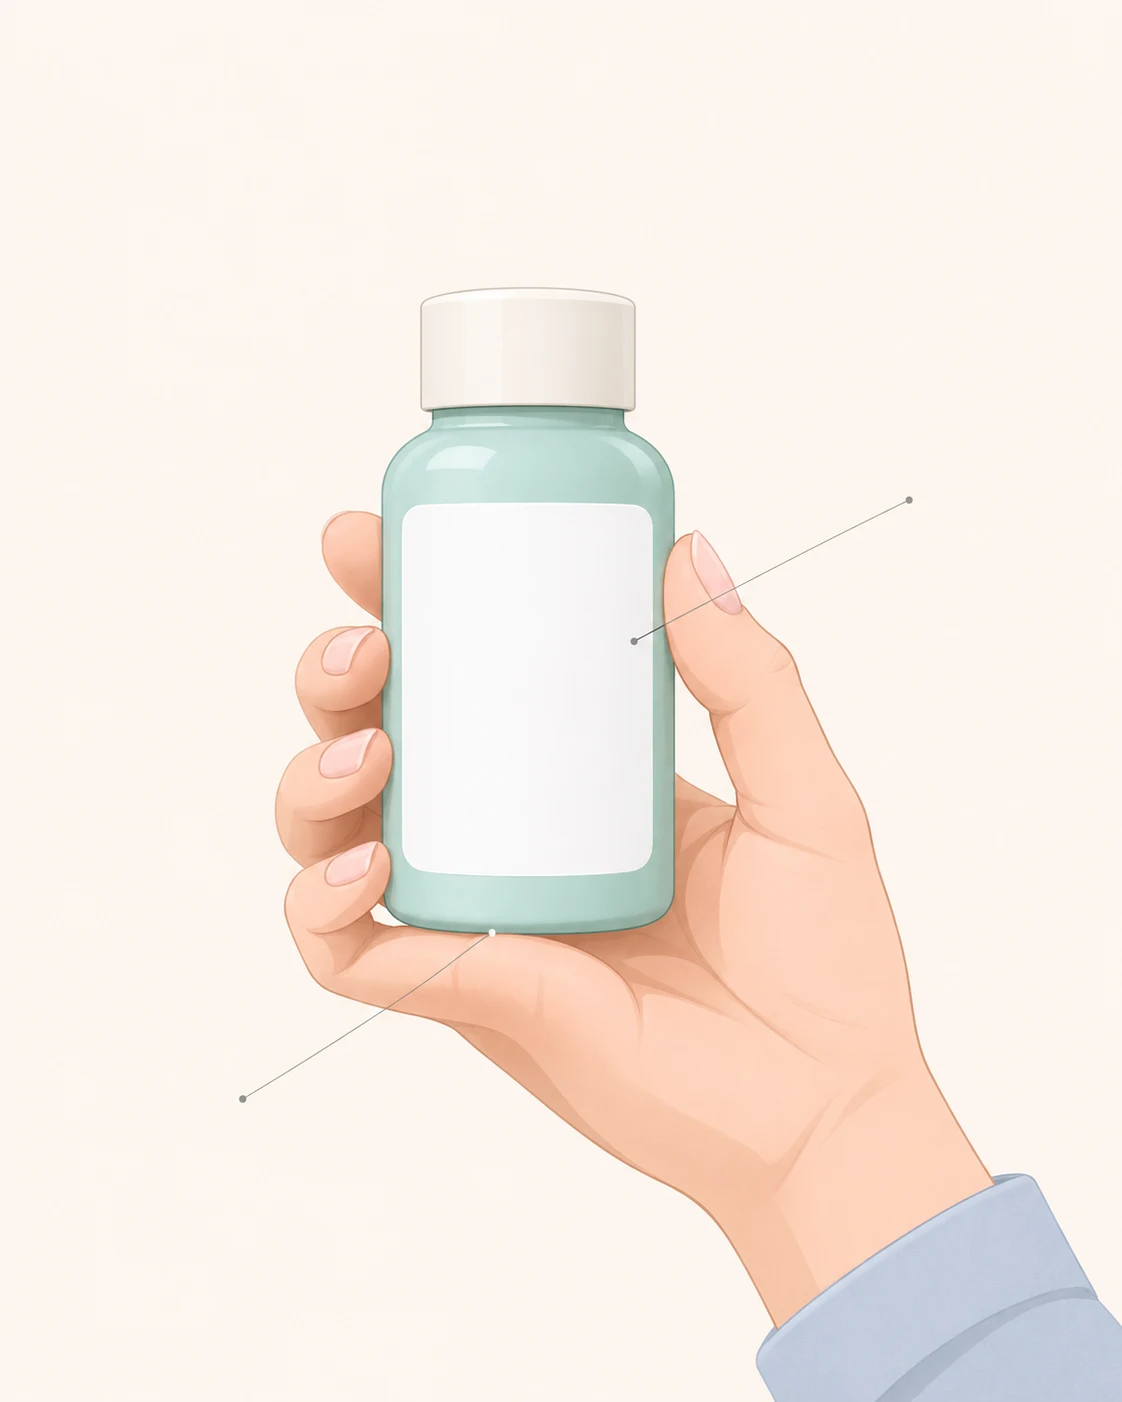
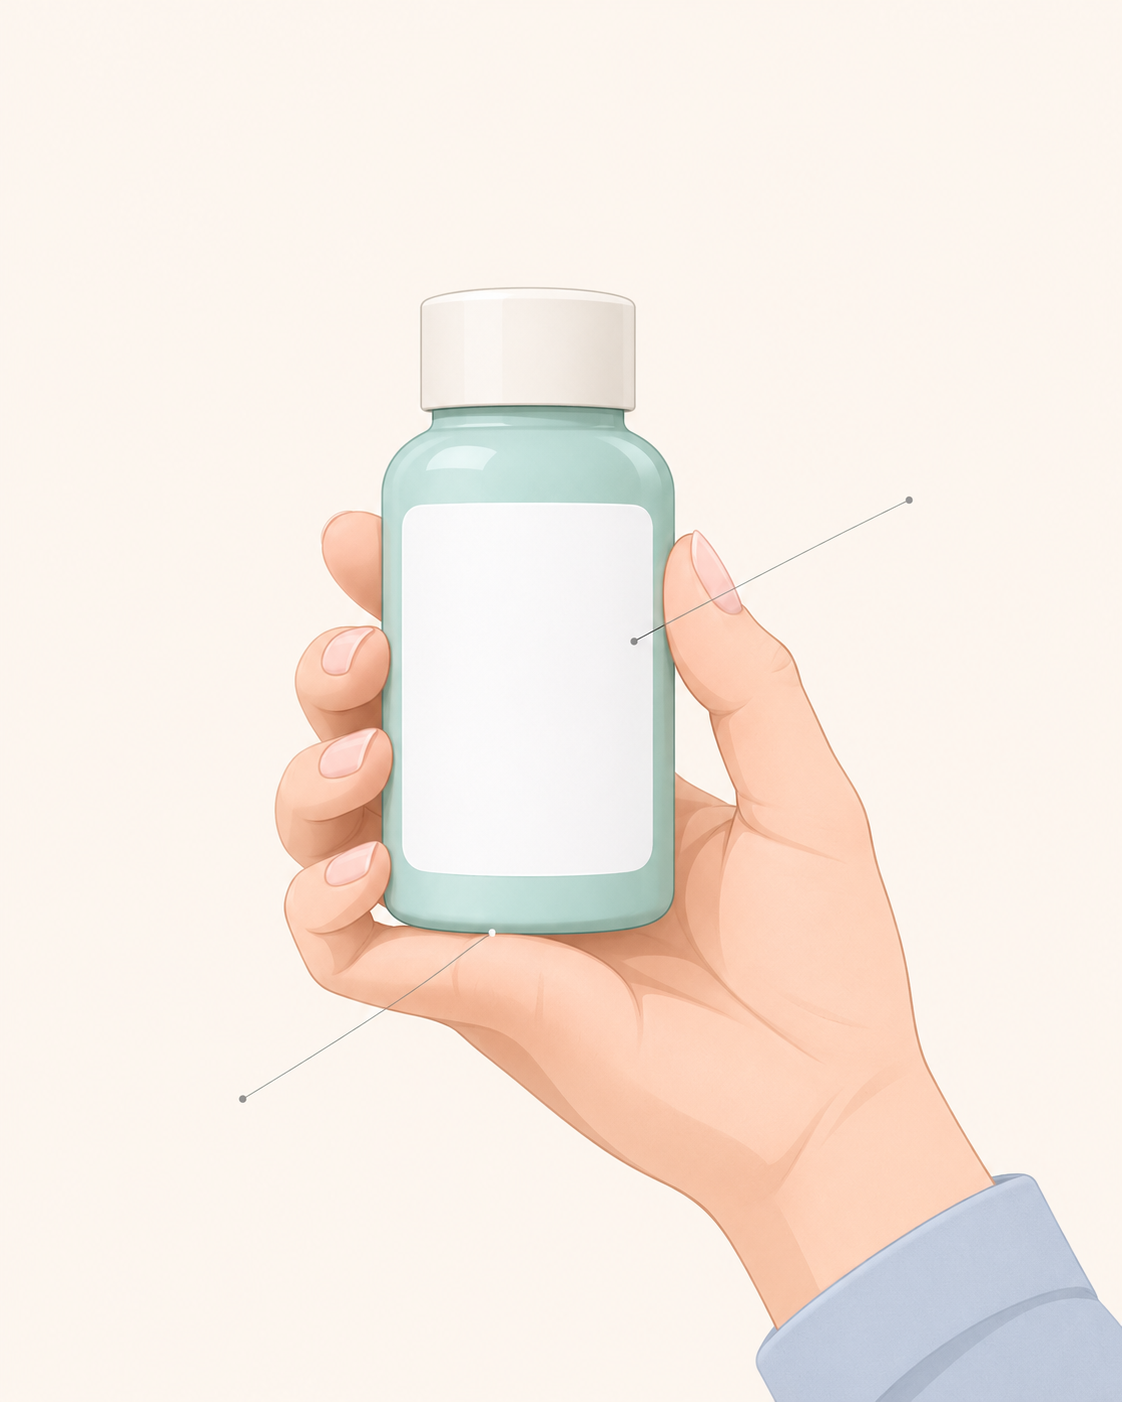
A bottle can sit beautifully in a hand while its label disappears behind a thumb. A graceful finger arrangement can also leave the product looking unsupported. In hand model product photography, an attractive hand is only useful if it helps explain the product.
Start with the job of the picture: identifying the bottle, showing its closure, or illustrating a pickup action. Then arrange the grip around that job. The small-bottle examples below are suggested working methods, not results from a shoot or test.
Give the important detail room
Identify the areas that must remain visible before choosing a pose: a front label, an opening, or a functional part on the side. One frame does not need to explain everything. An identification shot and an action shot can do different work.
For a label-led image, establish a stable grip first, then turn the bottle toward the camera. If a thumb covers the wording, change its position rather than asking the model to stretch a finger unnaturally. If revealing the label turns the bottle too far sideways, try moving the camera and reassessing the silhouette.
Some occlusion is purposeful. Fingers may cover part of a cap while opening it. That can suit an action image, but it makes the frame less useful as the only view of the cap's design.
A natural grip still has to support the object
Ask the model to pick up the product normally and pause in a sustainable position. Adjust only what interferes with the picture: perhaps rotate the bottle slightly or move a thumb off the label. Twisting the wrist, spreading the fingertips and facing the product squarely toward the camera all at once can turn an ordinary action into an awkward pose.
LifeCreated's article on shooting hands recommends purposeful hand placement and discusses stiffness and object weight. Use that as a starting point, not a reason to erase every sign of effort. A heavy or difficult object needs secure support; do not loosen a necessary grip to make it look delicate.
| Picture's job | Arrangement to try | Relationship to preserve |
|---|---|---|
| Show the front | Establish support, then face the label toward the camera | Support must not disappear to reveal the label |
| Show a pickup | Choose a moment from an ordinary pickup action | Finger placement should make sense for the action |
| Show an opening | Arrange the hands around the actual opening motion | A hovering gesture should not substitute for contact |
These are starting points, not universal poses. Shape, surface and weight affect what can be held safely. Put the item down between attempts when needed, and do not ask children to hold unsuitable loads.
Follow the product edge before judging the whole image
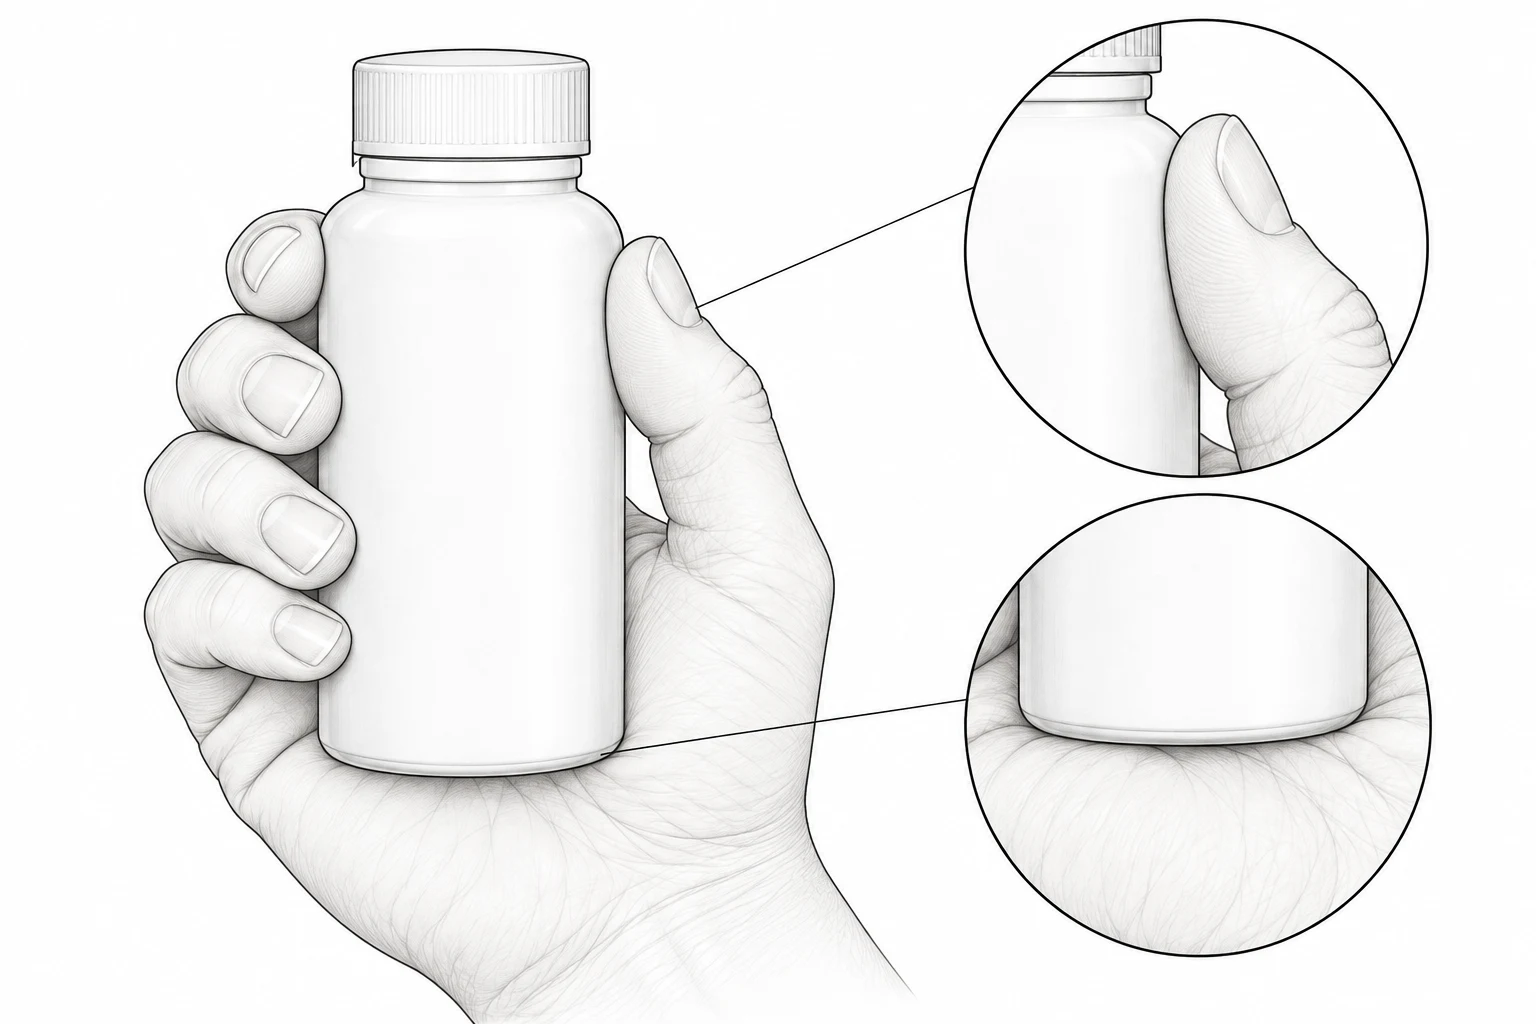
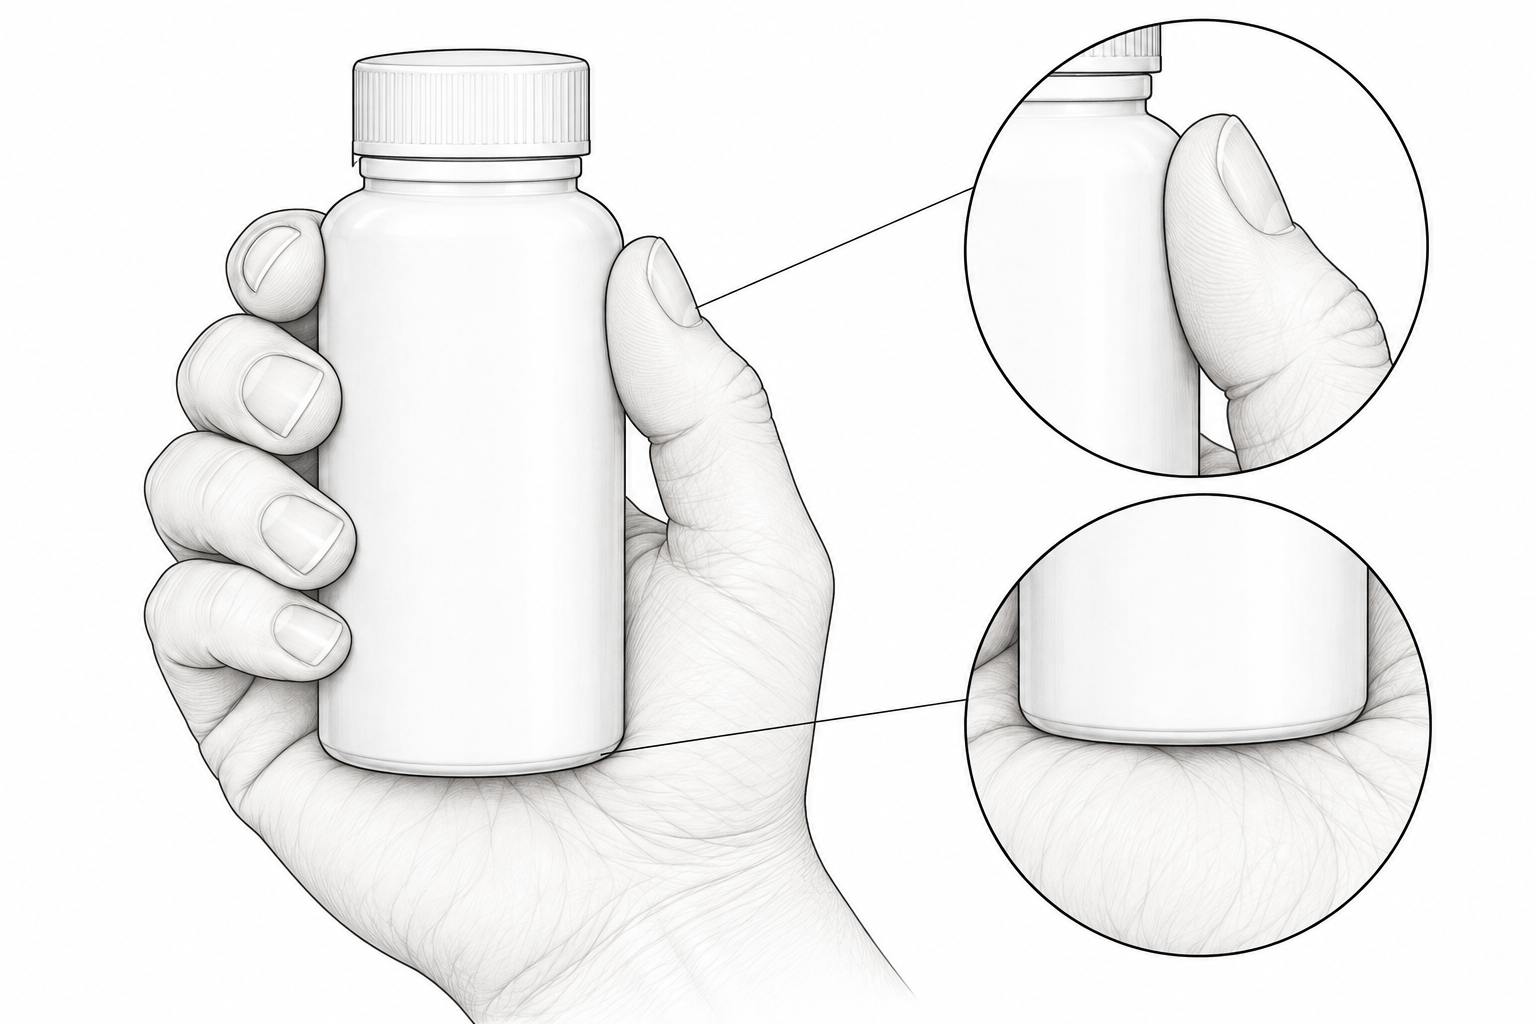
During selection, temporarily set aside the mood of the photograph and trace the product's outline. The same questions help when reviewing an AI composition sketch:
- Where do the fingers go? Follow visible fingers back toward the hand. Distinguish normal occlusion from an impossible connection. Not all five fingers need to appear.
- What actually touches? Look at the fingertip against the bottle and any hand beneath its base. Decide whether a gap is explained by perspective or leaves the depicted grip unsupported.
- Does the shape continue? Compare the bottle edges visible on either side of a finger. Investigate sudden narrowing, bending or misalignment without assuming that every odd-looking edge is a defect; perspective and occlusion can be misleading.
- Does the lighting explain the contact? Consider the main light direction, cast shadows and transitions near the contact area together. Soft or faint shadows do not, by themselves, prove a lack of contact.
A hand offers a familiar size cue, not a measurement. Hand size, grip, camera distance and perspective change the impression. If actual dimensions matter, provide verified dimensions or a photograph with a reliable scale reference. Do not infer capacity or length from a bottle appearing to fit in one hand.
For a real photo series, try keeping the camera position and product-to-camera distance consistent while comparing grips. This helps separate changes in occlusion from changes in apparent size, but it is still not a measuring method.
Keep nails, jewelry and sleeves in service of the product
Clean hands and nail edges, then check the packaging for fingerprints. If hand cream is used, watch for residue transferred to the surface.
Agree on nail length and color for the brand and action rather than prescribing one manicure for every shoot. Remove rings if they are not part of the picture, then check for visible pressure marks. Tattoos are not inherently faults; handle them according to the agreed brief rather than assuming they require removal.
Check sleeves in the actual frame. A cuff can hide the wrist, obscure the bottle base or make the action harder to read. Logos and strong patterns can compete with the product. Adjust the cuff and framing before deciding that an outfit needs changing.
Use AI only when a composition sketch helps
To explore which side a hand enters from or where the label faces, describe the composition in the InkRoom image-generation entry and select a configured model. Availability, parameters and fees depend on the current interface and account configuration; results are not guaranteed.
A direction might read: “One hand supports the base of a small bottle; the front label area remains unobstructed; a comfortable wrist angle and simple background; a composition sketch for planning a photograph.” This communicates intent, not a promise of accurate fingers, packaging or text.
Review the resulting sketch for anatomy, contact, product shape and shadows. It is not evidence of a person's actual use, the product's dimensions or its weight-bearing behavior. Those claims still require the real product, verified information and real photography.
Related articles and cases
- Plant Product Photography: Show Shape, Leaf Condition and Pot Size
Photograph live plants so buyers can understand their current shape, leaf condition and size. Build a useful shot list, identify individual or batch photos, and check that edits still match the plant for sale.
- Stationery Product Photography: Paper, Print, and What’s Included
Plan useful photos of greeting cards, notebooks, and stationery sets. Show covers, interiors, and edges without treating a photograph as proof of page count, exact dimensions, or included accessories.
- Wine bottle photography: readable labels, clear shoulders, honest fill levels
Make wine product photographs that identify what is actually for sale. Separate catalog images from lifestyle scenes, work around label reflections, and check product details after editing.
- Product Photography Props: Make the Product Clear, Not the Offer Confusing
Choose props for support, use context, or decoration. Compare a clean product shot with a lightly styled version, then check visibility, reflections, color competition, and what buyers might think is included.