AI Sketch to Render: Keep Architectural Intent in the Picture
Turn an architectural sketch into a useful concept rendering by separating design constraints from visual choices. Learn how to prepare inputs, compare directions, review geometric drift, and define the limits of image and API handoffs.
·
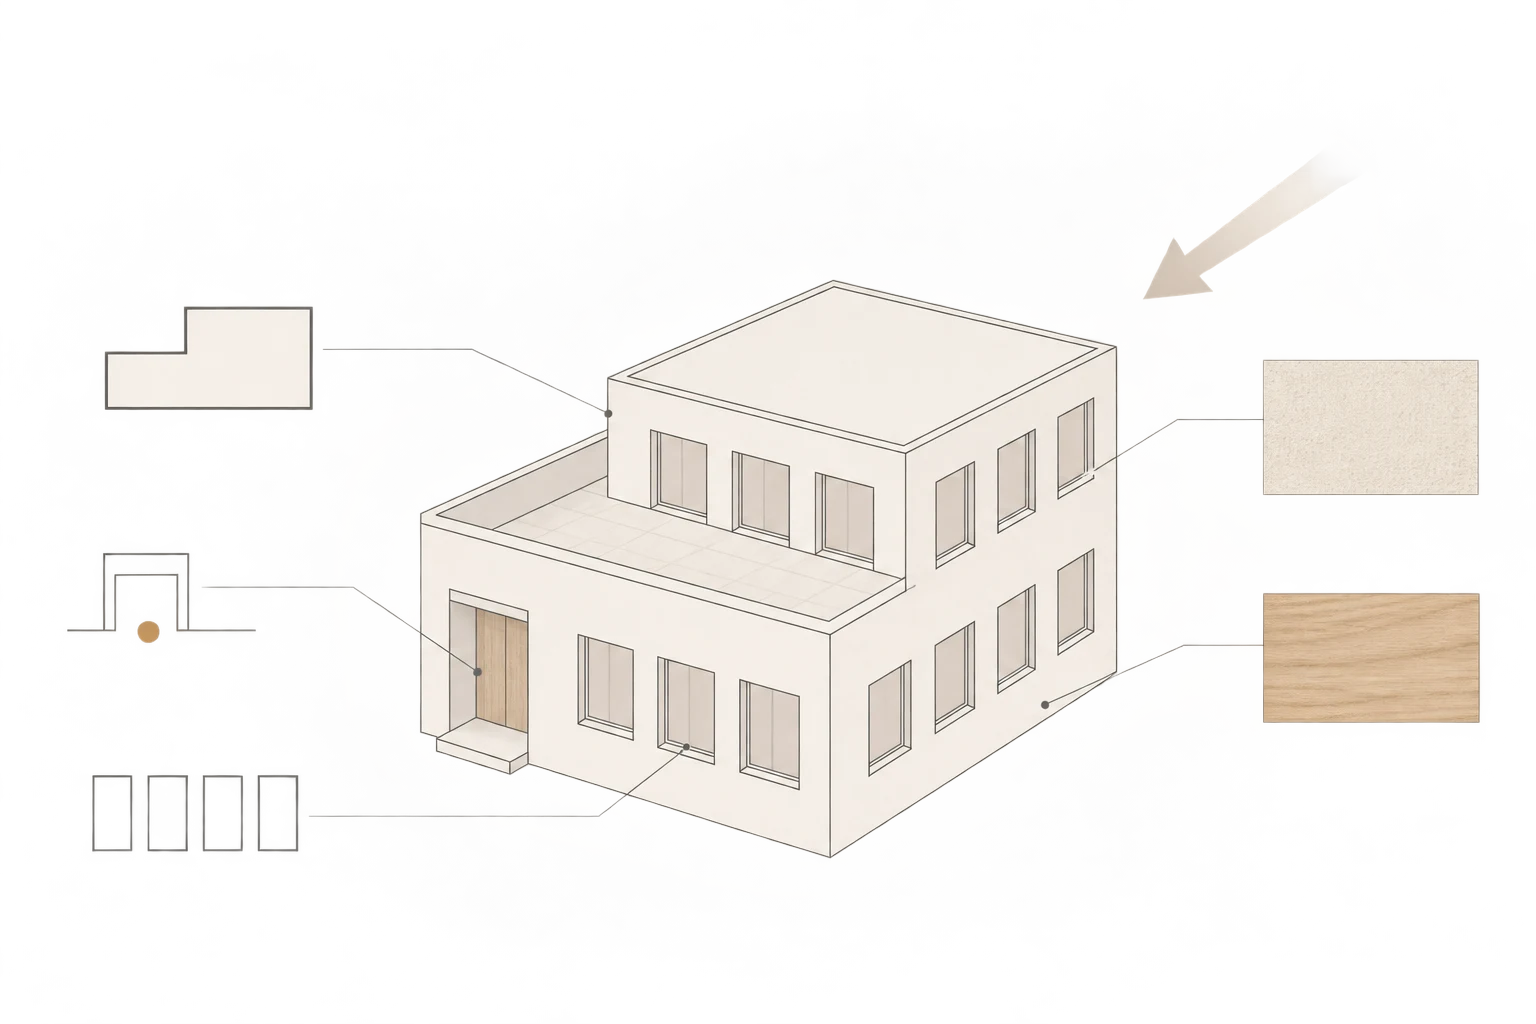
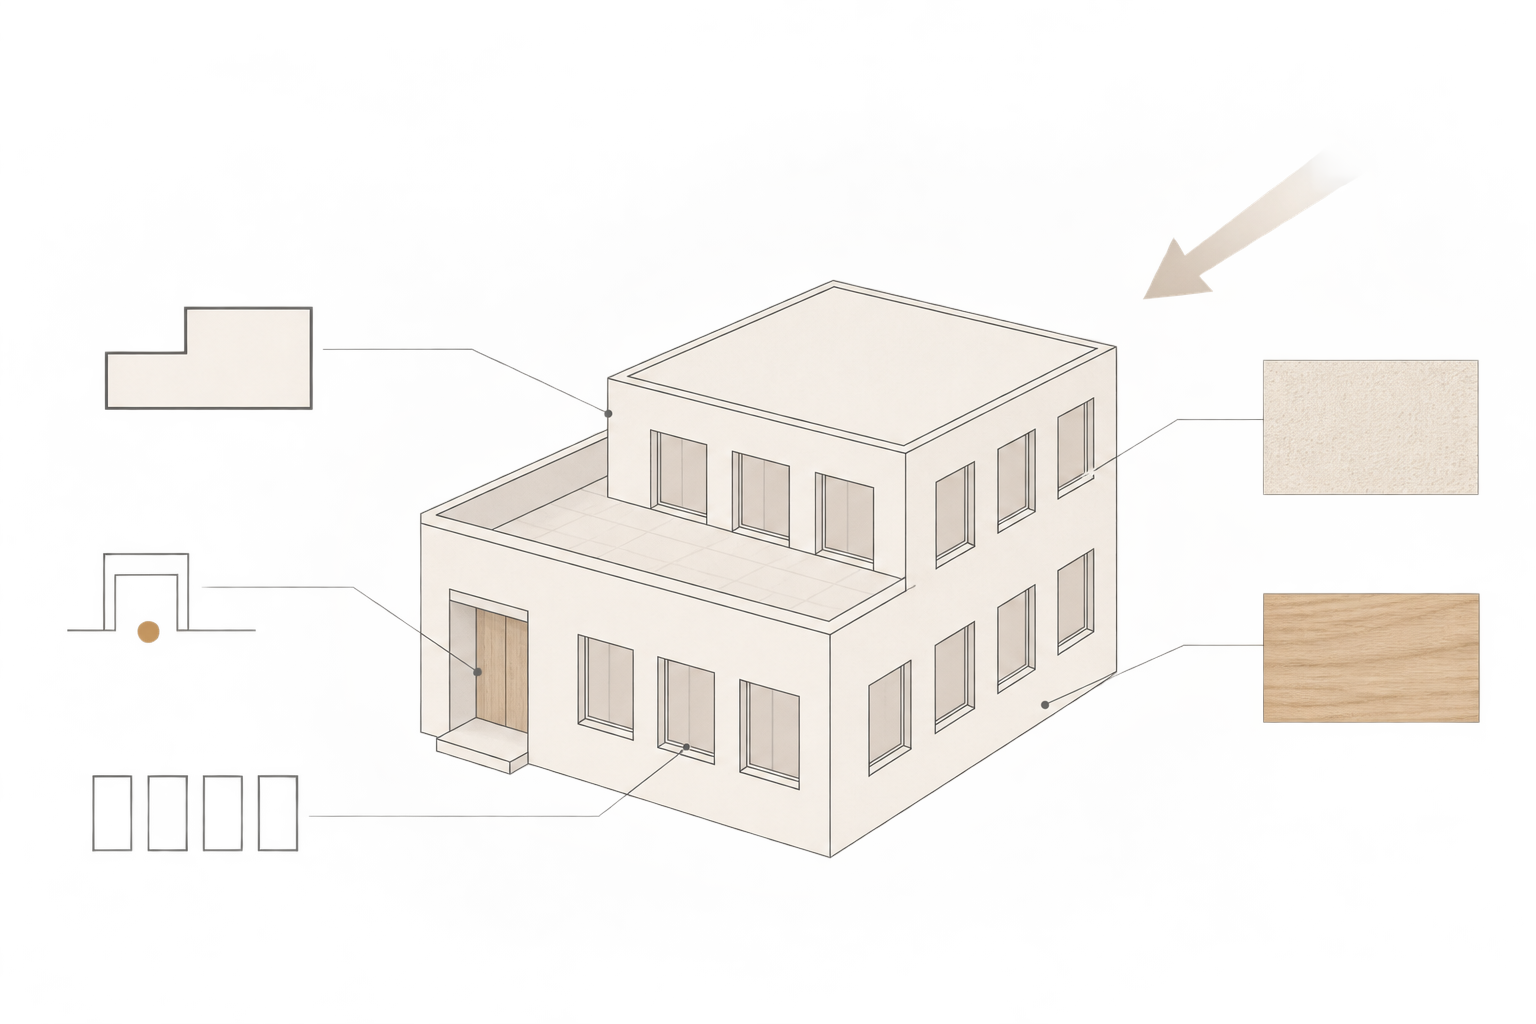
The most important part of a sketch may be a recessed entrance, a deliberate window rhythm, or an upper floor set back from the street. Once the image looks convincing, are those decisions still there?
That is the useful question behind an AI sketch to render workflow. Here, the output is a concept image for design discussion—not proof of an editable 3D model, accurate dimensions, or construction readiness. The following is a proposed working method, not a tested performance report.
Raitly’s architecture AI overview distinguishes applications involving massing, plans, and atmosphere. This guide focuses on early concept communication rather than treating that overview’s third-party feature descriptions as verified capabilities.
Give the image a design question
“Make it realistic” does not tell a reviewer what to decide. A more useful brief asks whether an entrance reads clearly, whether timber or a pale mineral finish better expresses the intended character, or whether shade under an overhang makes the entrance too dark.
Keep a comparison focused on a defined question. If the camera, openings, materials, and weather all change at once, it becomes difficult to explain which change influenced the decision. This is a way to organize design discussion, not a claim that a particular generation setting performs better.
Separate design evidence from visual choices
Prepare a legible sketch with the building outline, openings, and relevant site edges visible. Distinguish construction lines and annotations from intended geometry. If photographing a paper sketch, avoid introducing a tilted page as an accidental perspective cue. Resolve ambiguous lines in the source rather than asking a generated image to settle them.
Use an input brief like this to make the distinction explicit. It is not a product settings table.
| Input | What to clarify | Why it matters |
|---|---|---|
| Drawing type | Perspective, elevation, or plan; authoritative revision | A plan is not an unambiguous exterior view |
| Viewpoint | Visible elevations, viewing direction, whether the view must remain fixed | A changed camera makes proportions harder to compare |
| Design constraints | Storeys, entrance location, opening rhythm, setbacks, massing relationships | A polished image may depict a different design |
| Visual variables | Finish, surface character, lighting, or background atmosphere | Reviewers need to know which differences are intentional |
| Unresolved areas | Details or materials not yet decided | Invented detail can be mistaken for an approved decision |
Do not invent dimensions to complete an unclear sketch. Use the relevant drawing where dimensions are established; otherwise mark them as unresolved. Do not measure the design back out of the generated image.
For a hypothetical two-storey building with a left-hand entrance and an upper-floor setback, an instruction might read:
> Explore a concept rendering based on the supplied architectural perspective sketch. Design requirements: two storeys, entrance on the left, existing upper-floor setback and window rhythm, original viewing direction. For this round, explore only a pale mineral exterior finish and soft daylight. Do not add storeys, openings, or building volumes. Unresolved construction details are not design conclusions.
This is an illustrative brief, not a tested prompt. Stating a constraint does not establish that a tool will enforce it.
Make the alternatives comparable
Start each comparison from the same sketch revision and viewpoint. Explore a limited variable—for example, exterior finish—before opening a separate discussion about lighting. Avoid making each new output the sole reference for the next round: that makes a gradual departure from the original harder to trace.
Keep a simple association between the source sketch, input text, intended question, and output. Record the model or settings if the interface exposes them; leave unavailable information unknown.
For text-led concept exploration, the InkRoom image generation page provides prompt entry and a choice of configured models. Availability, parameters, and fees depend on the current interface and account configuration. If your task requires a sketch reference, first confirm that the current interface and selected model support that input. A generation entry point is not evidence of sketch constraints or geometry locking.
Review design drift before visual appeal
Place the source beside the result and identify corresponding landmarks: outline corners, entrance edges, ends of window bands, and setback boundaries. Review storeys and massing, then openings, proportions, and perspective. Discuss materials and atmosphere after those checks.
For matching compositions, a semi-transparent overlay in an image editor can help reveal displaced outlines or openings. It is a visual aid, not dimensional verification. If the views or crops differ, stretching one image to fit the other can hide the mismatch rather than resolve it.
Distinguish a representation issue from a design change. An entrance obscured by shade is different from an entrance moved elsewhere. A reflection resembling a new mullion is not necessarily another opening; check the drawing instead of turning plausible detail into a new design statement.
An output that adds a storey, changes the opening rhythm, or alters the setback relationship should be set aside for this comparison, or explicitly labelled as a proposed design change. Attractive materials are not approval for altered geometry. Where the image remains ambiguous, return to the sketch, model, or professional drawings rather than continuing to guess through prompts.
Hand off the image with its design basis
For a concept discussion, send the image with its source revision, the question it explores, and any known departures. Label it as an AI-generated concept illustration. It can support a conversation about appearance and atmosphere; construction dimensions, structural safety, and regulatory compliance still require professional documentation and the relevant review.
API work becomes relevant only when there is a defined programmatic or system-integration task. Manually exploring several directions does not, by itself, require an integration.
If integration is needed, first define the records you want to retain: source revision, design constraints, input description, output file, and human review status. Then consult the chosen service’s first-party documentation to establish its actual inputs and outputs. These are proposed workflow records, not API field names or capability claims. The supplied evidence is insufficient for a runnable request, endpoint, or parameter example.
The useful rendering is not simply the most atmospheric one. It is an image whose design basis, changes, and unresolved decisions remain explainable.
Related articles and cases
- AI Garden Design Generator: Explore Layouts, Then Check Growing Conditions
Turn a yard photo into a clearer design brief, explore layout separately from seasonal color, and check promising ideas against site measurements and local plant information.
- AI Furniture Design Generator: From Style Sketches to Dimension and Material Checks
Use a hypothetical entryway storage bench to explore furniture concepts, identify contradictions between views, and separate visual decisions from dimensions, materials, and construction that need independent validation.
- AI Jewelry Design Generator: From Ring Concepts to Manufacturability Review
Turn ring ideas into concepts you can meaningfully compare, without mistaking a convincing image for engineering evidence. Learn what to record, what different views can reveal, and what to ask a jewelry professional to verify.
- AI Typography Generator: From Lettering Concepts to Usable Deliverables
Decide whether you need a poster image, brand lettering, or an installable font. Then prepare exact text, inspect readability, and verify language coverage, file compatibility, and licensing separately.