AI Image Generation for Print on Demand: From File to Product Sample
A poster, mug, and garment give the same artwork different boundaries. Learn how to relate pixels to print size, adapt the composition, preserve upload versions, and examine samples without treating generated artwork as automatically print-ready.
·
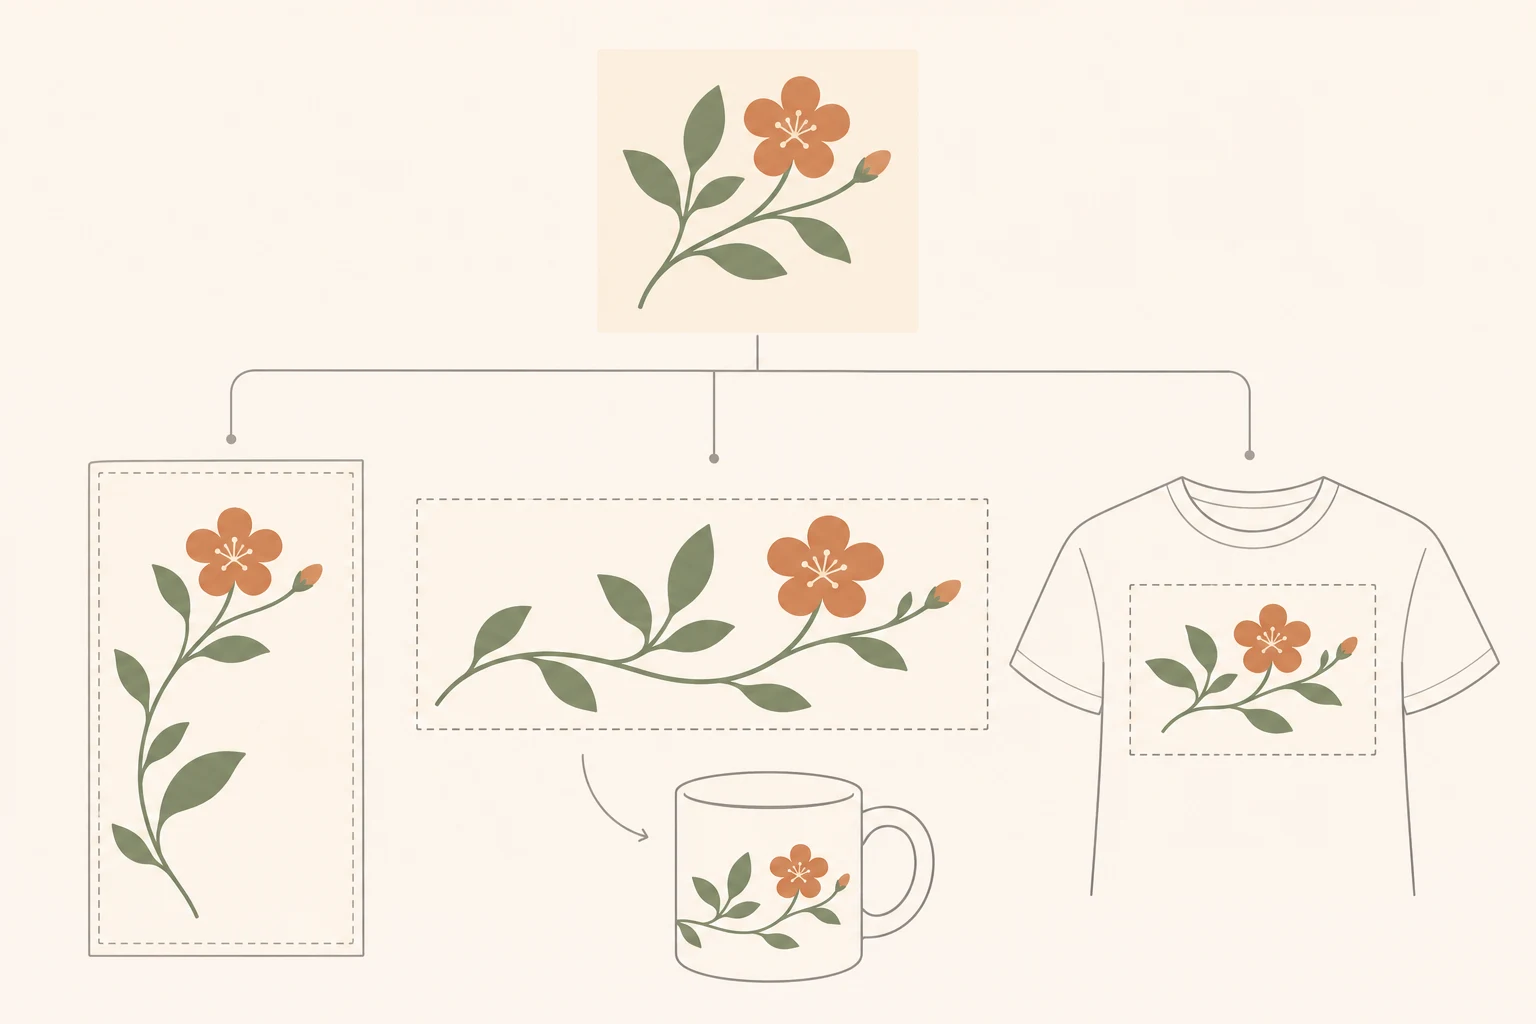
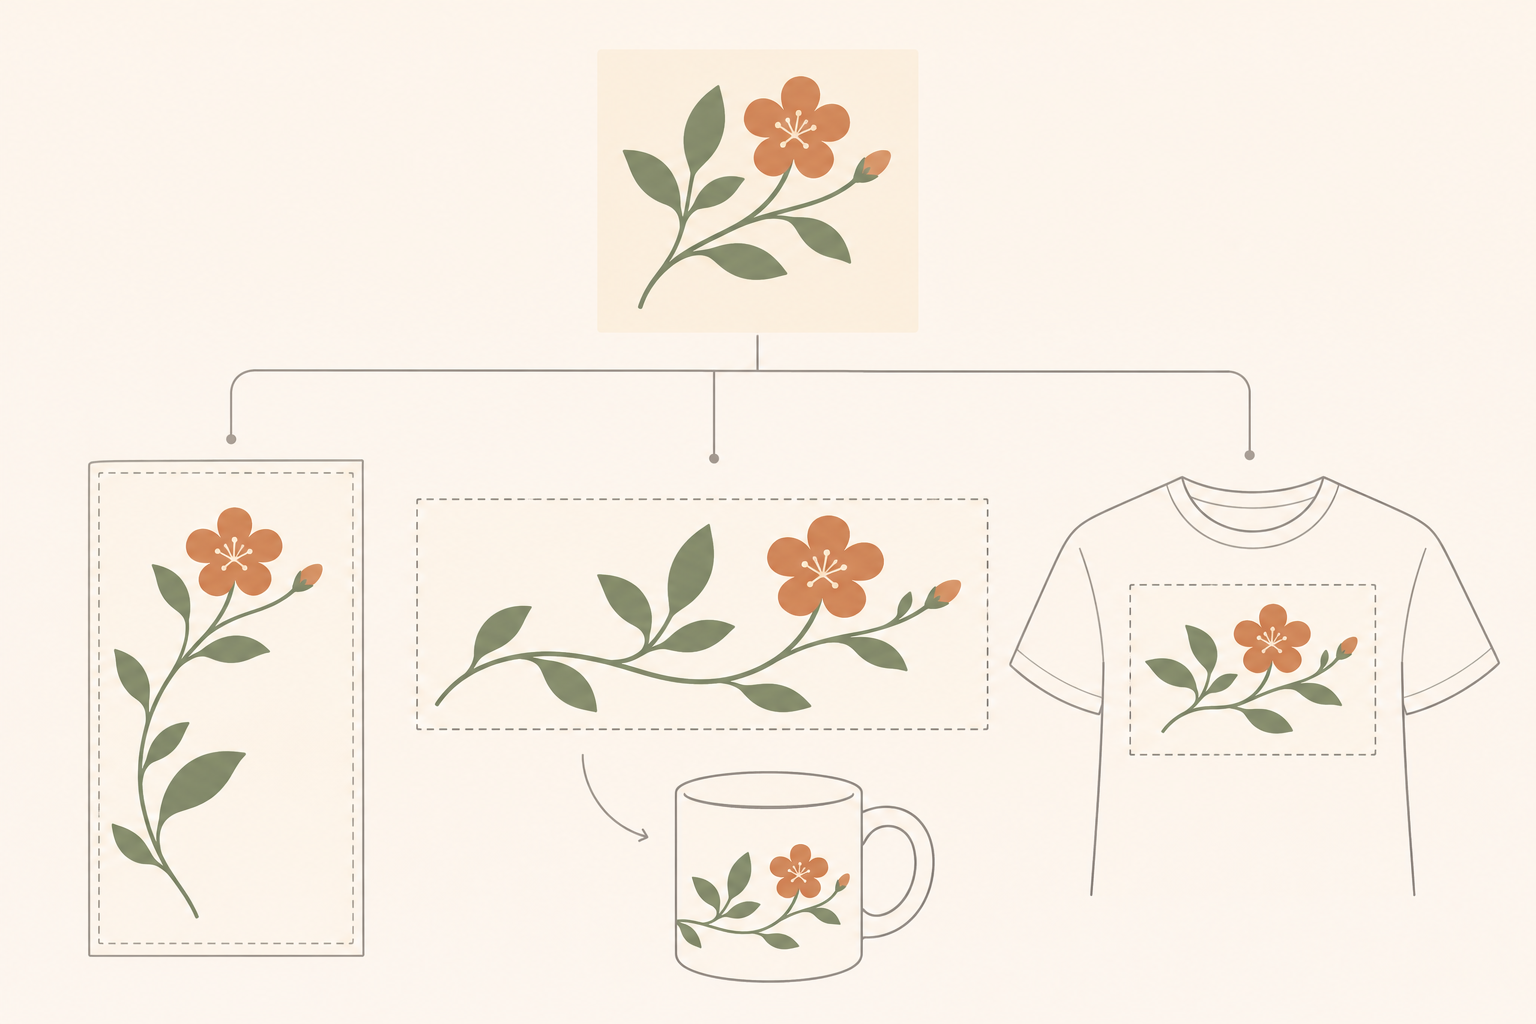
An image that looks good on screen can need a different crop on a poster, a different reading order around a mug, and cleaner background edges on a garment. For print on demand, generating the artwork is only part of the job. You also need to decide how that artwork fits a particular product.
This guide to AI image generation for print on demand covers file preparation and sample inspection. Posters, mugs, and garments are application examples, not completed tests. The supplied material does not include readable official product specifications or physical samples, so this article provides neither verified platform settings nor a production pass result.
One illustration, three different boundaries
Imagine using a botanical illustration across all three products. Keep the original artwork and create a separate working copy for each placement rather than repeatedly overwriting one file.
| Application example | Composition question | What to examine on the sample |
|---|---|---|
| Poster | How do the subject and any title fit the final aspect ratio and crop? | Unwanted cropping, small-text legibility, and the appearance of large color areas |
| Mug | Where do the main elements sit in the flat layout, and how will someone read them around the cup? | The position of the main image and whether text becomes awkward to read on the curve |
| Garment | How large should the graphic be in the chosen placement, and what happens at its edges? | Perceived graphic size, unwanted background remnants, and the legibility of thin lines and text |
These are design and inspection suggestions, not universal manufacturing requirements. Bleed, safe areas, seams, and unprintable regions must come from the selected product’s template. A diagram is not a basis for inventing those measurements.
Calculate the available pixels before discussing DPI
ZSky’s print-on-demand guide lists dimensions for several products using a common 300 DPI assumption. That highlights resolution as a concern, but it does not establish the requirements of your selected product. Read that product’s specifications first, then calculate the pixel density of your own artwork at the intended size.
For a raster image, divide the pixel count along one axis by the printed inches along that axis. The result is pixels per inch, or PPI. DPI commonly describes a printing device’s dot density; the terms should not be treated as interchangeable.
For example, a 2400 × 3000-pixel image printed at 8 × 10 inches has 300 PPI along both axes, assuming no crop or resampling. At 12 × 15 inches, it has 200 PPI. These are arithmetic examples, not approved dimensions for any platform.
Changing only the DPI or resolution metadata, without resampling, does not increase the pixel count or create missing detail. Resampling can increase the number of pixels, but a larger number alone does not prove that lettering, fine lines, or texture will print well. Calculate using the pixels remaining after the final crop, not the dimensions of the untouched original.
Describe the placement, not just “high resolution”
Once you have the product requirements, turn them into a creative brief: aspect ratio, subject position, open space, and whether lettering will be added separately. “Print-ready” and “high resolution” are not substitutes for those decisions.
A direction such as “vertical botanical illustration, subject centered, open space above for a title, no generated lettering” describes a composition. It is not a promise about output dimensions or print quality.
To create candidates, use InkRoom’s image generation page to enter a prompt and select a configured model. Model availability, parameters, and fees depend on the current interface and account configuration. Save the selected original and its prompt, then make product-specific copies. A generated candidate is not evidence of print compliance or a complete commercial-rights clearance.
For existing artwork, reconsider the composition before stretching it. A poster may need different open space; a mug may need a new horizontal reading order; a garment graphic may benefit from removing details that become difficult to read at its intended size. When checking transparency, view the artwork against both light and dark backgrounds rather than trusting one preview. Whether transparency is required, and which file format is accepted, still depends on the product specification.
Make every sample traceable to its upload
Before uploading, retain the original, the product-specific export, and a record of the applicable template or specifications. A filename can include the product, placement, version, and export date. What matters is being able to identify exactly which upload produced the sample.
At export, check pixel dimensions, file format, transparency, and color space against the product requirements. Read every word. A correct file extension does not establish that the contents are correct. Inspect background-removal remnants, malformed letters, and punctuation close to a crop boundary separately.
When the sample arrives, compare it with that exact upload version. Check crop and placement, then lettering and edges, followed by color and fine detail. Use reasonably consistent lighting for color comparisons; an uncalibrated screen is not an absolute color reference. If a color is unsatisfactory, record which area differs and in what direction rather than writing only “color mismatch.”
Separate problems already visible in the uploaded file from problems that appear only on the physical item. The former can first be addressed in the artwork or layout. For the latter, contact the producer with the uploaded file, order details, and photographs. Phone photographs also depend on lighting and are not precise color measurements on their own.
Keep rights records alongside the production files: the tool terms that applied when you created the image, licenses for reference assets and fonts, and the selling platform’s rules. Being able to generate, upload, or print an image does not settle every rights question. No physical samples, production results, or earnings data are supplied here; this method supports a future production check, not a claim that one has already passed.
Related articles and cases
- AI Image Licensing for Ecommerce: Permissions and Product Accuracy
Separate output terms, third-party asset licenses, input permissions, and product accuracy. Use an image-level record tied to the SKU without treating tool access as permission to publish.
- AI Concept Art Generator: From Exploration to a Clear Visual Direction
Turn a visual brief into comparable concept drafts, choose a direction for specific reasons, and document revisions. A fictional coastal signal station shows how to explore designs without mistaking concept images for production-ready game assets.
- AI Architectural Rendering Generator: Sketch Inputs and Render Review
Use a hypothetical building sketch to separate design constraints from visual choices, then review viewpoint, materials, proportions, structural relationships, and multiple views against the original design files.
- AI Character Turnaround Generator: Align and Review Front, Side, and Back Views
Turn one character reference into a reviewable set of views by separating confirmed design from invented details, checking proportions and anatomical sides, and documenting what the back view cannot establish.