ai image eraser: What to Check After the Object Is Gone
Removing a distraction is only part of the edit. Define what must stay unchanged, then compare the repair with the original for repeated textures, misplaced shadows, merged edges, and altered text.
·
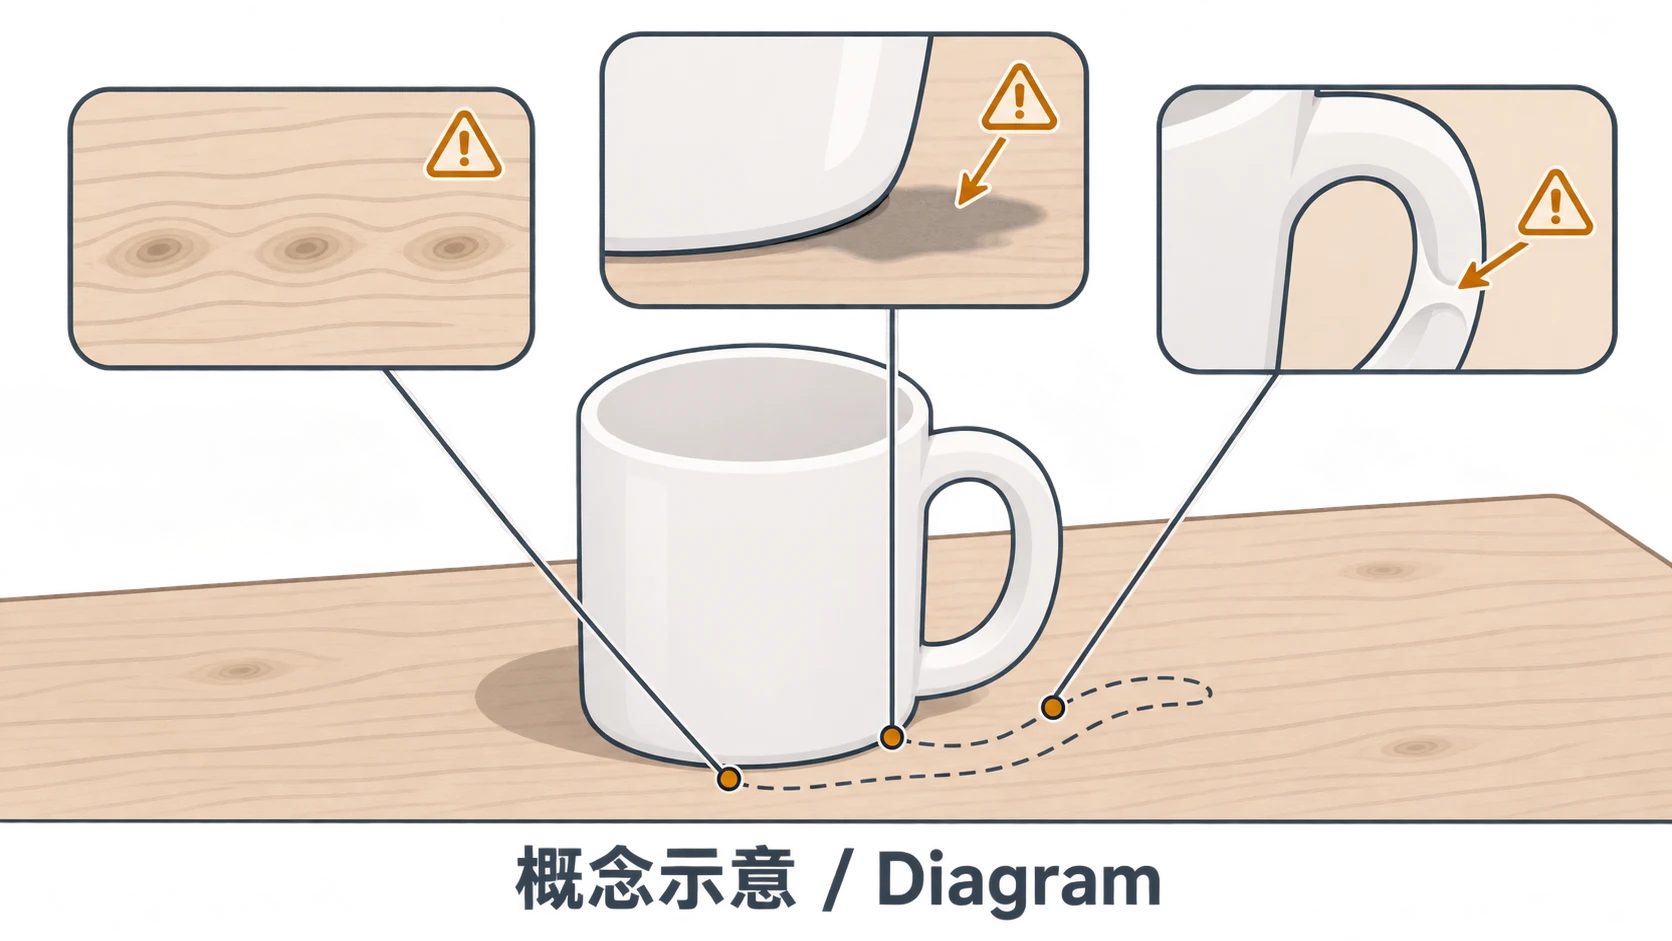
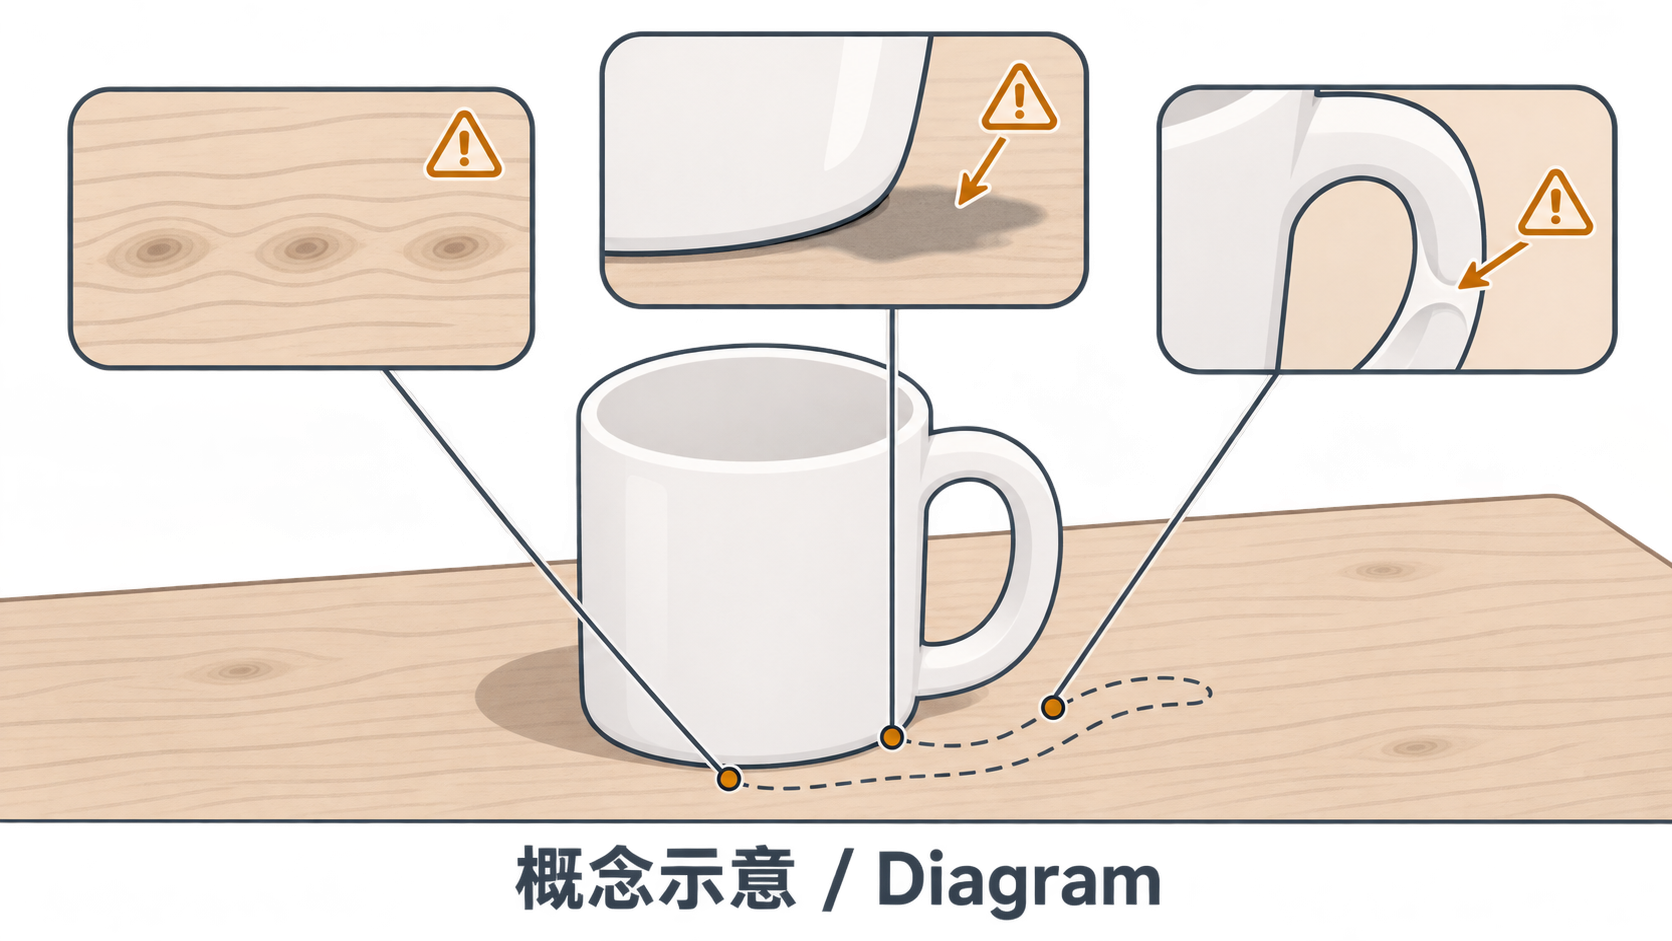
The cable is gone, but part of the mug handle has disappeared with it. The clutter has vanished, but the tabletop now has the same wood knot twice. With an ai image eraser, the useful question is not just whether the object disappeared. It is whether the repaired area still makes sense within the image.
PhotoGrid’s Magic Eraser page describes the task as selecting an unwanted area and having AI fill the background. That helps explain the purpose of local removal. Its claims about natural-looking results are not a substitute for inspecting your own image. The guidance below is an editorial inspection method, not a tool test.
Removing an object is not the same as replacing a background
Local erasure aims to remove a specified object and fill the space it occupied. Background removal separates the subject from its background. A whole-image redraw allows broader regeneration. If the task is to remove a cable beside a product, those are not interchangeable requests.
Keep an untouched original and save edits separately. Use the original to check both the intended repair and details that should never have changed.
There is a limit to that comparison: the original records what was visible, not what was hidden behind the removed object. Plausible-looking wood grain is not evidence that the actual concealed grain has been recovered.
Specify what must stay, not just what must go
Instead of asking to “clean up the image,” describe a bounded edit:
> Remove the loose cable on the right side of the table. Keep the mug’s position, handle outline, printed text, and contact shadow unchanged. Limit changes to the cable and the nearby area needed for the repair.
This is an example of an editing requirement, not a guarantee that a tool will obey every constraint. If local selection is available, keep protected edges and lettering outside the removal area wherever possible.
Consider shadows separately. A shadow belonging to the unwanted object may also need removal. The shadow where the main subject meets the table should not disappear simply because the request says “remove shadows.” If the distraction overlaps a product edge or label, do not assume erasure can recover its exact detail.
If you have an existing image to edit, you can open the InkRoom image-editing entry with the original and your local-edit requirements. Check whether the current interface supports the operation you need. This is an editing entry, not a promise of particular eraser controls or repair quality.
Inspect the joins, then step back
Start at the image’s native pixel scale, zoom in as needed to examine boundaries, and finish at the intended display size. A thumbnail can hide small changes; extreme magnification alone can distract from whether the whole image works.
| Area | Warning signs | How to compare |
|---|---|---|
| Wood, fabric, walls, and other continuous surfaces | Repeated knots or motifs, abrupt changes in direction, an unusually smooth patch | Trace the surrounding texture into the repair and compare its direction and spacing |
| Shadows and their boundaries | A leftover dark shape, a direction inconsistent with nearby shadows, a subject that appears to float | Examine the subject, lighting cues, and contact surface together |
| Subject boundaries | Missing handle sections or fine strands, separate outlines merging into one | Switch between original and edit at the same position and scale |
| Packaging, labels, and numbers | Changed characters, altered units or digits, fine lines merging with letters | Compare character by character rather than accepting something that merely resembles text |
For example, if the removed object crossed a tabletop seam, follow the seam from both sides and inspect the reconstructed middle. If it touched a mug handle, check the opening inside the handle, not just the space where the unwanted object used to be. These are inspection cues, not automatic pass/fail tests.
Retry cosmetic patches; escalate changed information
A repeated background texture may justify another attempt with a smaller edit area, provided the subject remains intact. Compare that attempt with the original. Avoid endlessly editing a failed version until the reference point is lost.
If the product loses part of its shape, packaging text changes, numbers no longer match, or an important edge is reshaped, stop using that version and send it for human review. Where a crucial detail was hidden in the original, use another reliable photograph or reshoot to verify it. Generated detail is not evidence of what was there.
Finally, view the image in its intended context. Does the repair draw attention at the publishing size? Is important text still readable? Does the subject retain its original information? Making the distraction disappear is only part of the job; keeping important content unchanged is the boundary that matters.
Related articles and cases
- AI Image Prompt Generator: Turn a Vague Idea into a Testable Brief
Define the image’s job and essential details before adding style keywords. Use a reusable brief, compare short and structured prompt examples, and revise one variable at a time without mistaking a clearer prompt for proven image quality.
- AI Image Generator for Social Media: From Visual Brief to Format Review
Separate the image you want to generate from the information that must stay exact. Build a base image, add approved copy, and review each placement as its own design.
- AI Product in Hand Generator: Keep the Grip and Packaging Consistent
Create a handheld scene from product references without confusing a plausible image with verified product evidence. Learn what to specify and how to review fingers, contact shadows, scale, occlusion, and packaging text.
- AI Product Recoloring: Separate Color Previews from Listing Approval
Build color concepts from an original product photo, define what may change, and verify each result against the real SKU before naming, approving, or publishing a variant.