AI Flat Lay Generator: Create Apparel Layouts You Can Check
Turn clothing references into a brief for an overhead flat lay without treating invented details as product facts. Learn what to specify, what to compare, and when a real product photograph is still necessary.
·
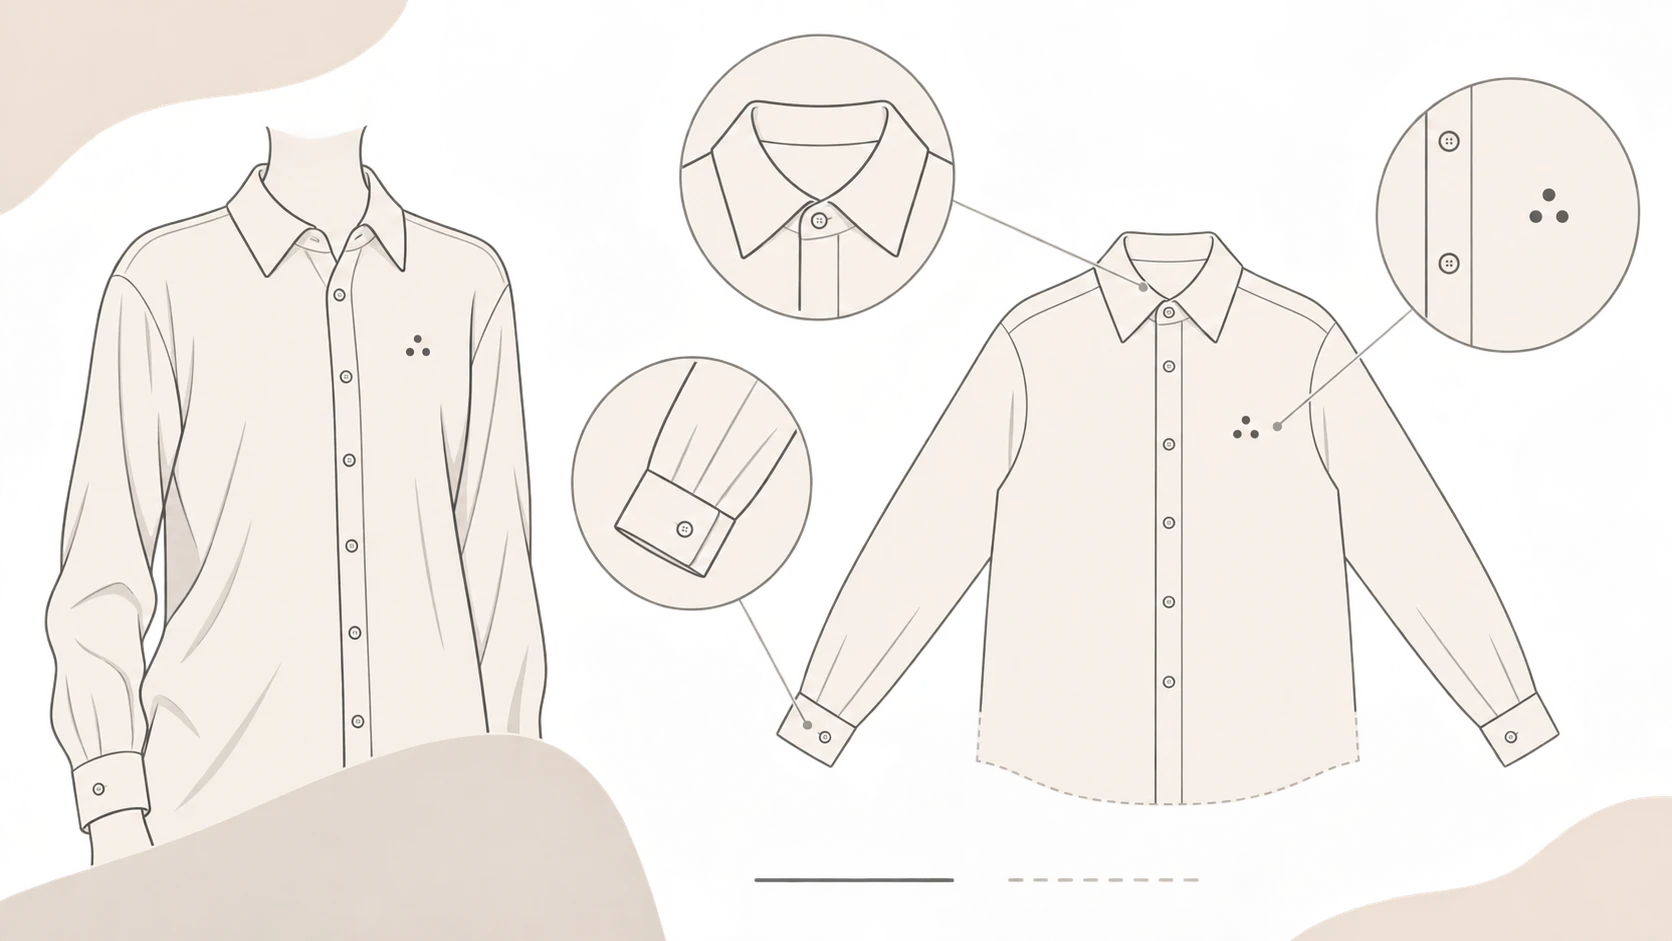
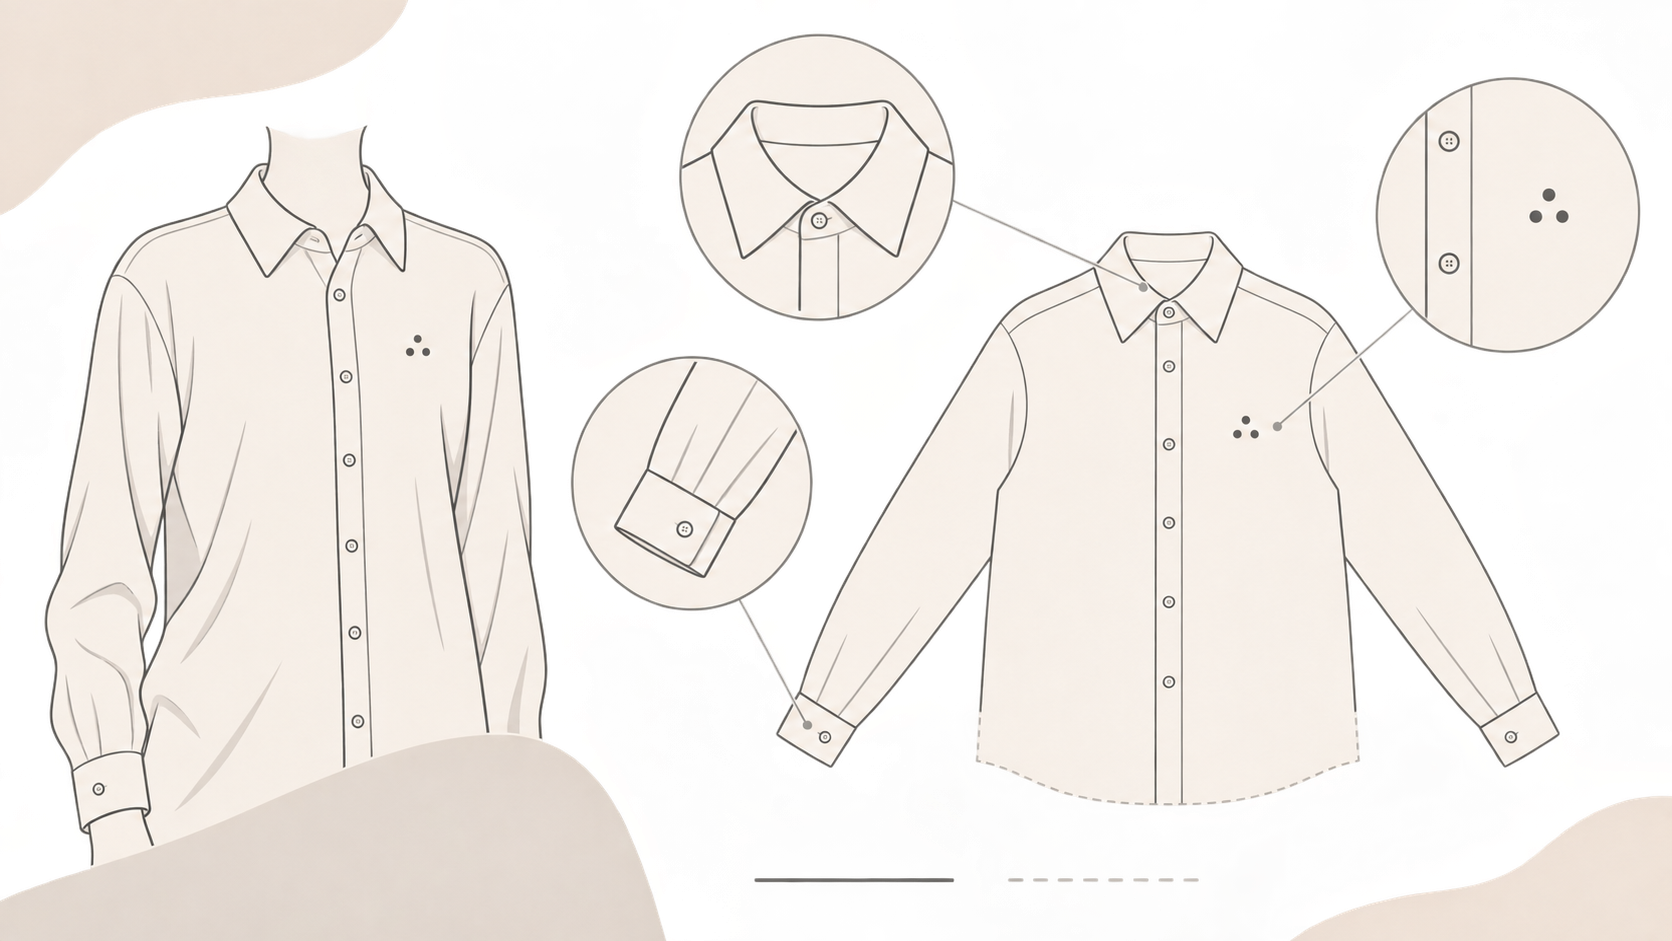
A photo of a shirt on a model may show its color, collar and part of its print. It may not show the shape of the hem once the shirt is laid out. When using an ai flat lay generator, the useful question is not just whether the result looks overhead. It is whether the product details in that new view can be checked against evidence.
An AI flat lay can help explore a catalog composition. Looking realistic does not make it a record of the actual garment. For product presentation, assess the layout and the accuracy of the product information separately.
An overhead view changes more than the background
Media.io’s AI Flat Lay Generator page describes reconstructing ordinary product photos as overhead flat lays, rather than simply cutting out the subject and replacing its background. That distinction explains the search intent: the garment needs a new arrangement, not just a different backdrop.
Moving from a worn garment to a laid-out garment can expose areas the source never showed. A hand may cover a cuff. A tucked-in shirt may hide its hem. A fold may conceal part of a print. Those gaps call for additional references, not confidence in a plausible-looking result. The reference page’s exact-match language is a vendor description, not a result verified for this article or a promise about InkRoom.
Mark what is unknown before generating. If a detail is not visible, obtain another photograph or leave it unverified. Do not use the generated image as evidence for its own accuracy.
Let the reference describe the garment and the prompt describe the scene
Use photographs of the same item, colorway and version. A full view helps establish the silhouette; close-ups help establish the collar, cuffs, fastenings and print. If references disagree about a structural detail or color, resolve the discrepancy before asking a model to interpret them.
Separate the brief into two kinds of information:
- Product information: the construction, color relationships and print placement that must not change.
- Scene choices: placement, background, framing, spacing and whether accessories are permitted.
Here is an illustrative brief for a single shirt, not a tested recipe or an accuracy guarantee:
> Using the supplied shirt reference, create a direct overhead composition of one garment laid flat. Center the body, spread the sleeves naturally, and keep the collar, cuffs and hem fully in frame. Use a plain light-gray background, soft even lighting and enough space around the garment for later cropping. Add no shoes, bags or decorative props. Preserve the collar shape, placket, sleeve length, color relationships and print placement that can be confirmed in the reference. Treat unclear construction details as unresolved and check them separately after generation.
The value of this brief is its specific comparison points, not words such as “premium” or “high resolution.” Choose the aspect ratio for the destination, too. A square product card and a vertical editorial panel need different framing; a reference example’s ratio is not a requirement.
To try creating a composition, open InkRoom’s image generation page, enter a prompt and select a configured model. Reference-image input, available settings and charges depend on the current interface and account configuration. This is an image-generation entry point, not a verified dedicated garment-to-flat-lay converter. If the interface does not accept the necessary reference, do not present a text-only clothing generation as a reconstruction of that specific product.
Check the garment, not just the advertising finish
Place the reference and candidate side by side. Check construction before surface polish. The following is a suggested review method, not a measured account of any tool’s error rate.
| Area | What to compare | What to do if it is wrong |
|---|---|---|
| Framing | Complete collar, cuffs and hem; room for the intended crop | Adjust framing, then check the garment again |
| Collar, cuffs and placket | Shape, fastening type and visible button count | Return to a detail reference rather than accepting overall resemblance |
| Prints and marks | Placement, repeat units and letter shapes | Compare with a clear close-up; do not approve unsupported detail |
| Silhouette and folds | Whether a crease became a seam or a fitted cut became loose | Separate placement changes from construction changes; add a laid-out reference if needed |
| Color and fabric appearance | Obvious color shifts or a matte fabric rendered as glossy | Revisit the real item and reference lighting; do not use the generation as a color swatch |
A laid-out shirt does not need every wrinkle from the worn photograph. It does need to avoid changing what those wrinkles imply about construction. Spreading a sleeve changes placement; adding a panel seam can change the apparent product.
When a detail is wrong, identify the missing evidence first. If the cuff is clearly visible in a reference, revise that part of the brief and compare again. If every reference hides it, more adjectives will not reveal it: obtain another photograph. Review the entire garment after each new generation rather than assuming previously correct areas stayed correct.
Decide what the image can represent
An internal layout concept and an image used to describe an actual product have different responsibilities. A concept can support a discussion about spacing and styling. A product image needs its factual details checked. For stains, wear, damage or the current condition of a secondhand item, use photographs that show the real condition rather than a generated substitute.
No generation test was conducted for this article, and the source page’s example images were not visually inspected. These are human-review recommendations, not a guarantee of compliance with a marketplace’s listing policy. Check the destination’s image requirements before publication.
Production checklist
- The candidate is linked to a specific product version, colorway and reference set, not filed by visual resemblance alone.
- Unverified product details are recorded; unresolved candidates are not published as accurate product representations.
- The intended role—concept or factual product presentation—is explicit, and destination-specific labeling and image rules have been checked.
- Real photographs are retained and used wherever the image must document condition, damage or wear.
Related articles and cases
- AI clothes changer: check the person and the garment separately
A convincing outfit edit can still misrepresent the garment. Use a person photo and garment reference to review two outfits, record specific differences, and separate visual concepts from evidence of real fit.
- AI Image Upscaler: How to Tell Whether Enlarged Details Are Usable
A 2x or 4x enlargement adds pixels, not proof of accurate detail. Start with the required dimensions, then check text, logos, faces, and product textures against what you can actually verify.
- AI Ghost Mannequin Generator: Keep the Garment, Change the Presentation
Use garment reference photos to define what an AI edit should preserve, identify hidden areas that need evidence, and separate a visual concept from an accurate product image.
- AI Virtual Ring Try On: References, Proportion, and Better Corrections
Prepare hand and ring references, compare styles without confusing visual scale with ring size, and identify problems in settings, perspective, contact, and shadows.