AI Comic Storyboard Generator: Make Each Panel Follow the Story
Use an invented short scene to turn a script into panel descriptions, establish character and setting references, and review generated roughs for continuity before lettering and layout.
·
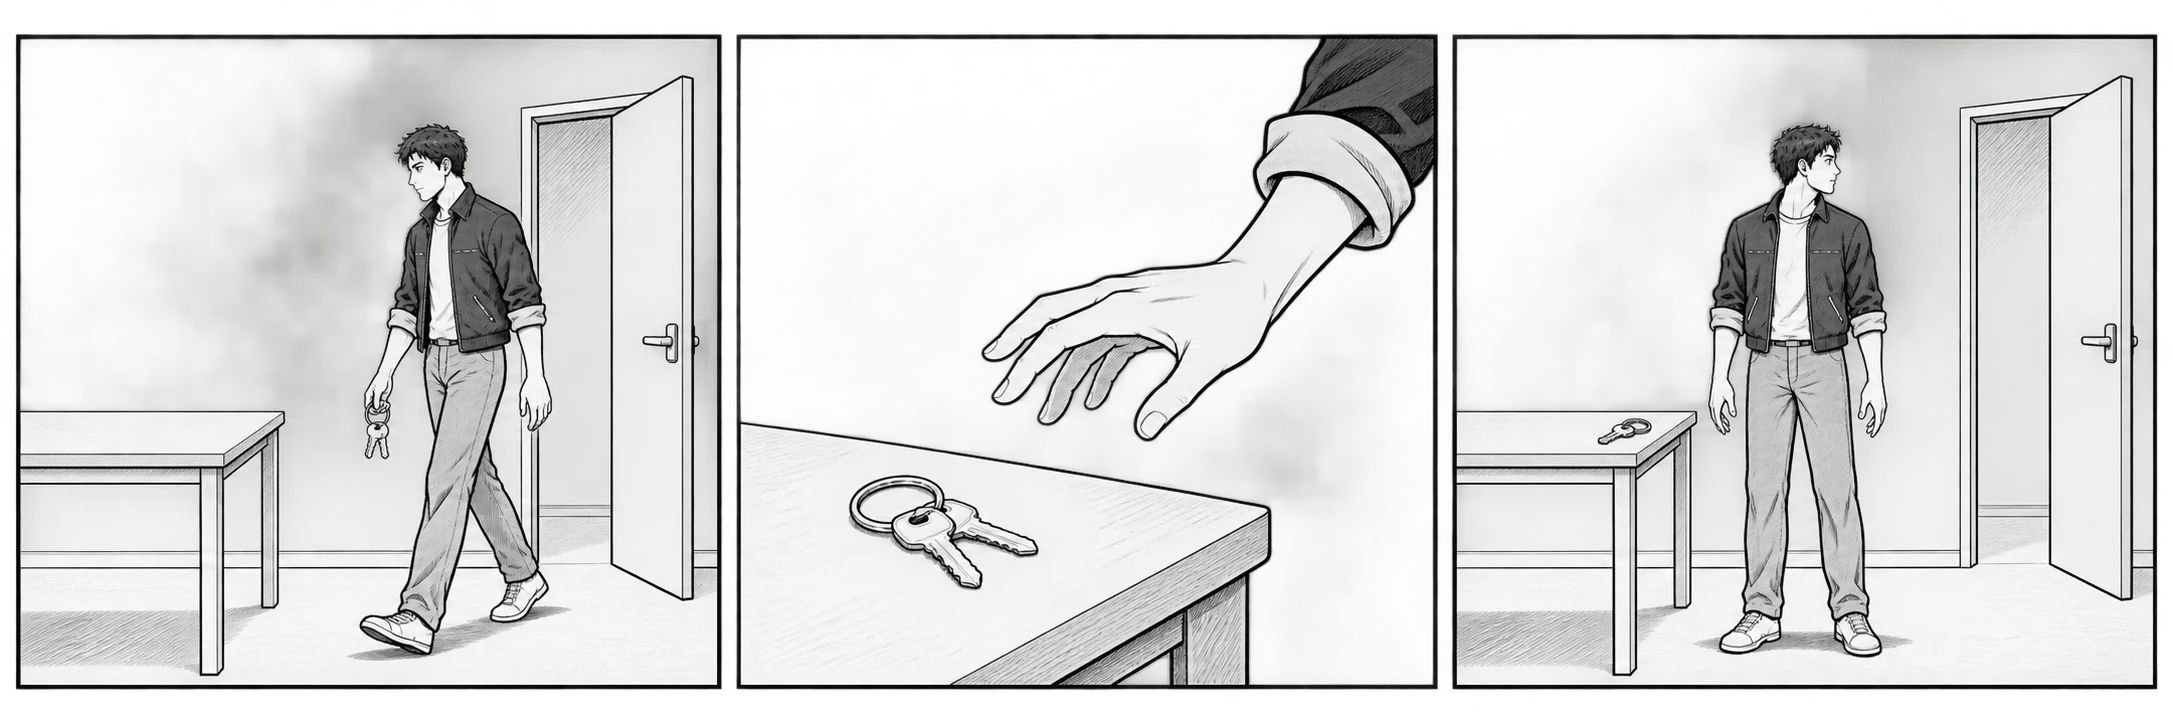
A convincing panel can still break a story. A character puts down her keys, then holds them again in the next image. A doorway shifts, making the same room look like a new location. With an AI comic storyboard generator, the useful question is not just how detailed an image looks, but what each panel tells the reader.
Treat generation as a way to explore storyboard roughs: decide the narrative information yourself, create images for those decisions, and review the sequence. That is different from expecting a finished, publishable comic from one request.
Katalist’s guide to comic storyboarding describes storyboards as a way to explore composition and framing before final illustration. That planning role is useful here; its unverified claims about automated consistency or efficiency are not evidence for this workflow.
When does the reader learn that the keys were left behind?
Consider this invented script, written to explain the method rather than report a generation test:
> Lin enters her studio and leaves her keys on the table. Someone knocks. She turns toward the door without picking them up.
Entering, putting something down, hearing a sound, and turning are separate changes. Asking one panel to show all of them can collapse a sequence into an ambiguous instant. Start by choosing the visible states the reader needs to understand.
| Panel | Information the reader needs | Suggested framing | State carried forward |
|---|---|---|---|
| P1 | Lin enters the studio | Wide horizontal view establishing table and door | Clothing and room arrangement |
| P2 | The keys have been put down | Horizontal close-up, hand withdrawing from the keys | Keys on the table, not in her hand |
| P3 | The knock makes her turn | Horizontal medium view, shoulders turning toward the door, table visible | Keys still on the table; she has not approached the door |
Three panels suit this example, not every scene. Add a pause if hesitation matters. Omit a dedicated key close-up if the object has no narrative significance. Choose panel count for the information and pacing, not the number of images a generator can produce.
Separate what stays fixed from what changes
Before generating, keep a compact reference note. For this example: Lin wears a short dark jacket with rolled cuffs; the table stands to the left of the door; there is one set of keys. Keep any character references you created or have permission to use alongside those notes. References provide something to compare against; they do not guarantee visual consistency.
Then describe only the changes needed for each panel: action, viewpoint, framing, and essential objects. Repeating the entire script in every prompt makes the intended instant less explicit.
A proposed description for P2 could be:
> Black-and-white comic storyboard rough, horizontal close-up. Lin wears a short dark jacket with rolled cuffs. She has just placed one set of keys on the studio table; her fingers have released them and her hand is moving away. Emphasize the separation between hand and keys. Leave dialogue and sound-effect lettering out for now.
This is a suggested creative description, not a tested prompt. “Putting down keys” is less precise than selecting a visible state: still gripping them, touching the table, or withdrawing an empty hand.
Once a panel description is ready, you can enter it at InkRoom’s image-generation entry and select a configured model. Availability, parameters, and fees depend on the current interface and account configuration. If you intend to supply a reference image, check the available input options first. This does not establish automatic script breakdown, consistent characters across a sequence, or one-request storyboard completion.
Review pairs of panels, not just individual images
P2 may look plausible in isolation. P3 reveals the problem if the keys have returned to Lin’s hand. Ask both “Does this image read?” and “Does it follow from the preceding image?”
Read the roughs in story order to check actions and when information is revealed. Then inspect clothing, the number of keys, and the relationship between table and door. A new viewpoint can legitimately move the door to the other side of the image. Check whether the room remains coherent and the viewpoint change is understandable, rather than treating every screen-left or screen-right change as a mistake.
Write revision notes as specific instructions:
> P3: The right hand is holding the keys, contradicting P2. Leave the keys on the table and remove them from the hand, while retaining the existing turn toward the door.
For an existing rough that needs revision, visit InkRoom’s image-editing entry to check the currently available editing options. The entry is not a promise of automatic continuity repair. After a change, compare P2 and P3 again to see whether it introduced another object or pose conflict.
Lettering and layout can change whether the sequence works
Reserve space for dialogue in the roughs, then add and proofread the text manually. A balloon can hide the hand action or draw the eye to the wrong next panel. Correct wording alone does not establish a clear reading order.
Read the assembled page or vertical sequence in its intended direction. If the images do not show whether the keys were put down, consider clarifying the visible action rather than covering the gap with explanatory dialogue. Storyboard roughs are useful because they expose those decisions before final artwork; they do not replace drawing, proofreading, or layout judgment.
Related articles and cases
- AI Background Remover for Product Photos: White, Transparent, and Clean Edges
A white background is not the same as a transparent file. Learn how to check exported product photos, inspect handle openings, glass, fine fibers, and shadows, and flag areas that need manual editing.
- AI image to image generator: change one thing, then check what stayed
Use an existing product or character image with a clear change request and explicit preservation requirements. Learn how to write a focused prompt, review the result, and track cost by usable output rather than candidate count.
- AI Ad Creative Generator: Make Room for the Product and the Message
Plan an ad background around real copy, keep product and offer details accurate, and adapt the composition rather than simply resizing the finished image.
- AI Image Generator for Ecommerce: A Workflow for Product, Lifestyle, and Marketing Images
Decide what each image must prove before choosing generation or editing. Separate real product evidence from creative concepts, review every deliverable, and compare costs using usable images rather than generation counts.